
© North Star Military Figures click here to order more GASLANDS Home Latest North Star Stargrave Frostgrave Oathmark Crusader Artizan Great War Shieldwolf Using Implements of Carnage in Gaslands Gaslands Refuelled POST APOCALYPTIC VEHICULAR MAYHEM
Using Implements of Carnage in Gaslands
Using Implements of Carnage in Gaslands North Star Magazine home page
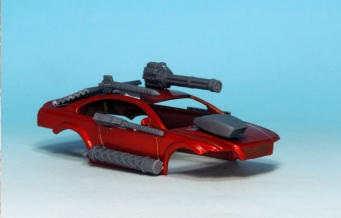
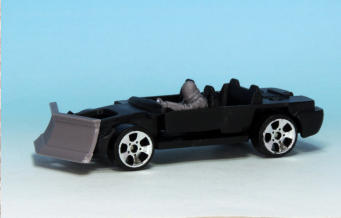
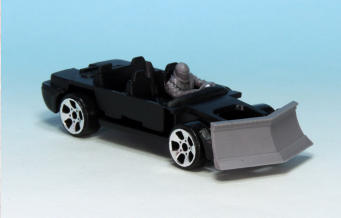
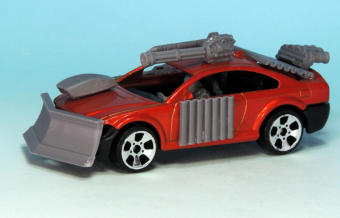
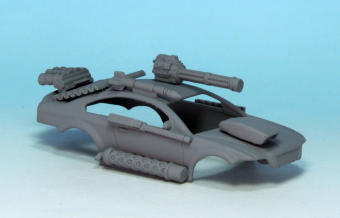
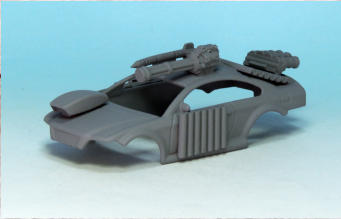
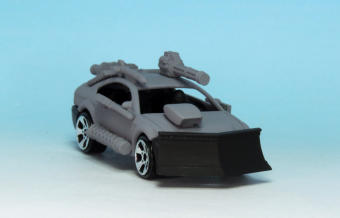
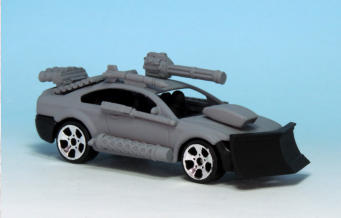
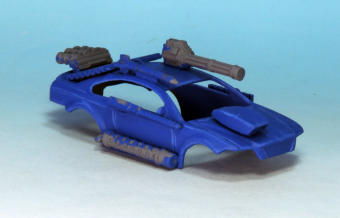
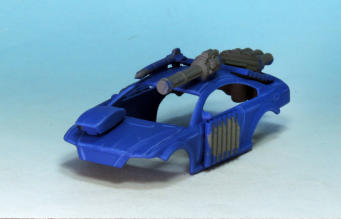
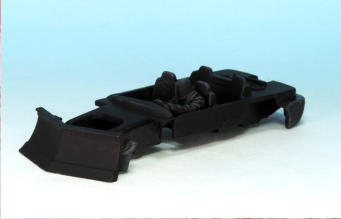
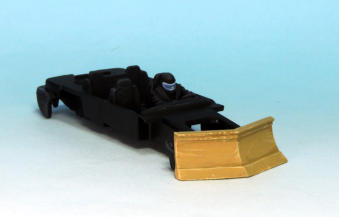
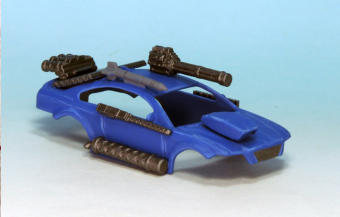
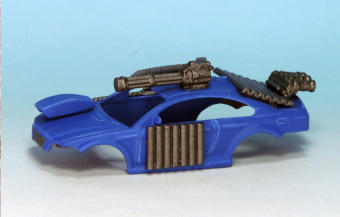
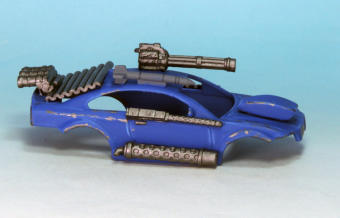
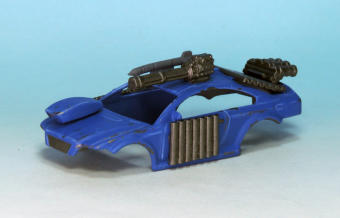
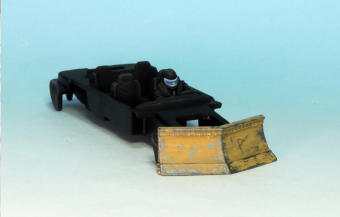
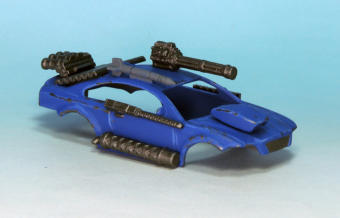
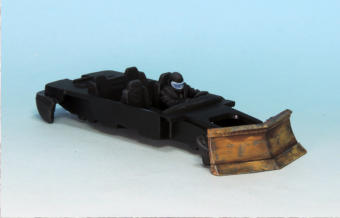
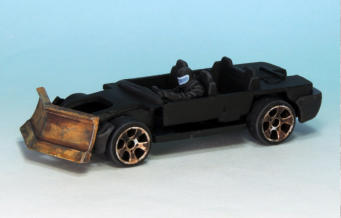
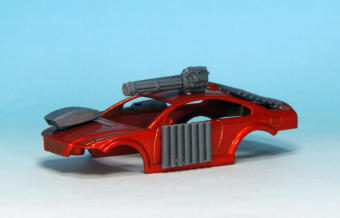
CARS FOR GASLANDS The great thing about these particular cars is that they are fixed together with small screws rather than the usual rivets common with most small scale die-cast cars. This makes life so much easier when you want to put a driver in. As you will see I didn’t take apart the more conventional “Hot Cars”, I built on them just as they came.  So firstly I took the car apart, and then gave the body a quick wipe over with airbrush solvent to remove fingerprints, as this won’t touch the paint on the body. ADDING IMPLEMENTS OF CARNAGE Having cleaned up the bits of Carnage with a scrape of the scalpel that I keep just for cleaning up plastics, which is extremely sharp, I had a long think about what would look good, rather than was appropriate for the rules…  I worked on the body shell first, doing a dry run with Blutack to see if it all looked ok in position. Then I used superglue to attach all the bits, with the help of an accelerator.  I then turned to the chassis, adding a driver and dozer blade on the front bumber. The driver himself was a bit of a tight fit I had to remove the steering wheel from the car and used the arms with a steering wheel from the frame, and fixed them to the driver at the shoulders and the wheel was glued to the cars dashboard.

North Star Military Figures
PRIMING I gave the body a light spray with car primer (which seemed appropriate!), this really pulls it all together to look at, but not essential if you aren’t going to repaint the body. Painting this body is essential as it was an awful metallic bronze colour that no self-respecting post- apocalypse racing bad-arse would use. Also I black undercoated the chassis and driver too.
Then I highlighted the body by adding white to the Ultramarine Blue, just highlighting the edges and then again with more white mixed in the blue mix. CHASSIS I all painted black areas with black mixed with Army Painter Skeleton Bone, then highlighted them with a layer with more Skeleton Bone in the black.
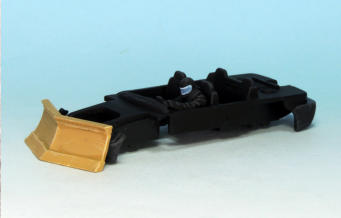
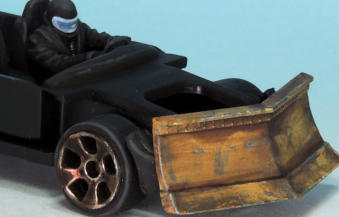
DOZER BLADE AND VISOR The blade was painted with Desert Yellow, and then edge highlighted with Desert Yellow mixed with white, and then highlighted again using more white in the mix. I painted the visor with Wolf Grey, which I highlighted up quite a few times by adding white to the Wolf Grey.
I have a scalpel that I use for nothing else but cleaning plastics.
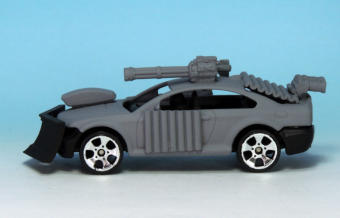
I just popped the body on to the chassis just to see how they looked together.
These cars are fixed together with small screws.
PAINTING IMPLEMENTS OF CARNAGE
I gave the body a light spray with car primer (which seemed appropriate!)
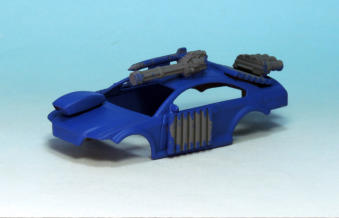
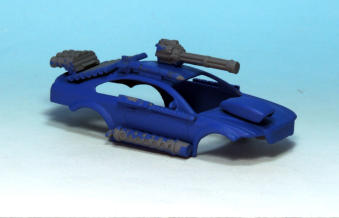
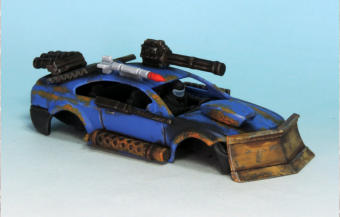
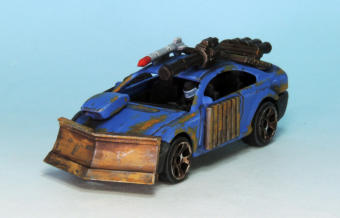
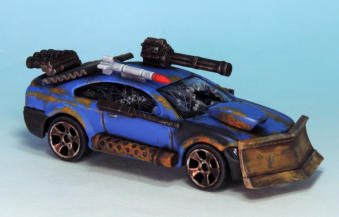
BODY SHELL I gave the shell an all over coat of Army Painter Ultramarine Blue. The colour was inspired by the car on the front to the rule book; I should have done a white stripe up the body too!
I gave the shell an all over coat of Army Painter Ultramarine Blue.
The blade was painted with Desert Yellow, and then edge highlighted with Desert Yellow mixed with white.
I painted on some damage in Gun Metal, and the same on the dozer blade.
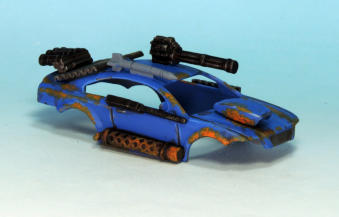
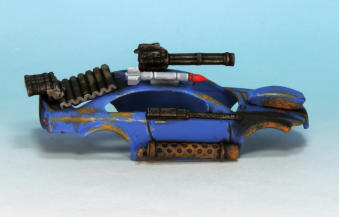
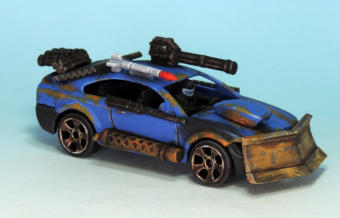
IMPLEMENTS OF CARNAGE All the implements were given a coat of Gun Metal, apart from the missile.
I then gave the Dozer an overall coat or two of Mid Brown Quickshade wash.
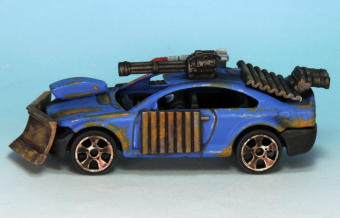
TYRES I painted the wheels black and then highlighted the black exactly as I did with the chassis. DAMAGE No self respecting post-apocalypse racing bad- arse could race in a pristine car, so I painted on some damage in Gun Metal, and the same on the dozer blade. I tried not to do too much, but it’s hard to stop yourself!
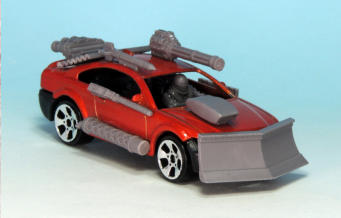
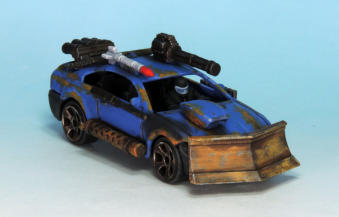
FINAL ASSEMBLY Finally the whole thing together.
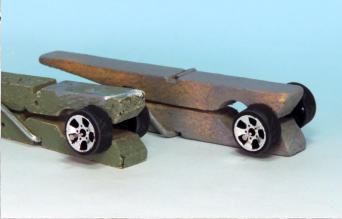
I gave the wheels a coat of Mid Brown Quickshade wash.
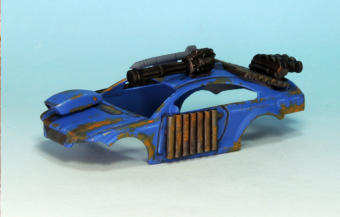
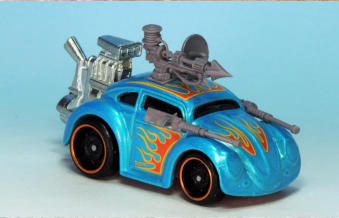
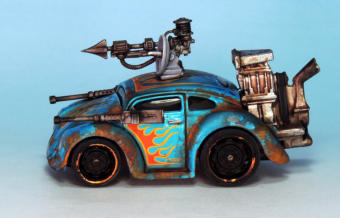
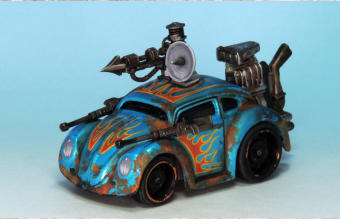
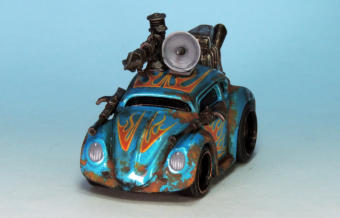
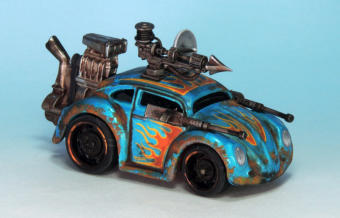
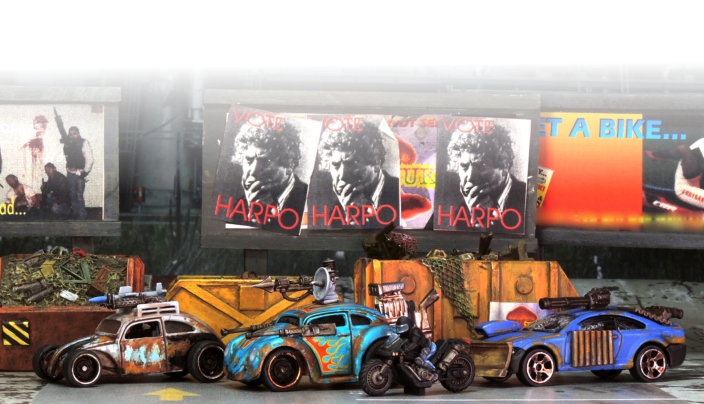
What's from the frame? Machine guns, harpoon gun and satellite disc.
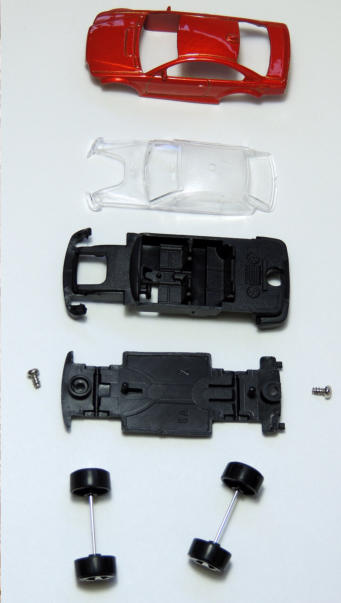
The great thing about these particular cars is that they are fixed together with small screws rather than the usual rivets common with most small scale die-cast cars. This makes life so much easier when you want to put a driver in. I worked on the body shell first, doing a dry run with Blutack to see if it all looked ok in position. Then I used superglue to attach all the bits, with the help of an accelerator.  I worked on the body shell first, doing a dry run with Blutack to see if it all looked ok in position. Then I used superglue to attach all the bits, with the help of an accelerator.  I then turned to the chassis, adding a driver and dozer blade on the front bumber. The driver himself was a bit of a tight fit I had to remove the steering wheel from the car and used the arms with a steering wheel from the frame. I then turned to the chassis, adding a driver and dozer blade on the front bumber. The driver himself was a bit of a tight fit I had to remove the steering wheel from the car and used the arms with a steering wheel from the frame.
I used superglue to attach all the bits, with the help of an accelerator.
I just popped the body on to the chassis just to see how they looked together. I just popped the body on to the chassis just to see how they looked together. Painting this body is essential as it was an awful metallic bronze colour that no self-respecting post-apocalypse racing bad-arse would use. Also I black undercoated the chassis and driver too. Painting this body is essential as it was an awful metallic bronze colour that no self-respecting post-apocalypse racing bad-arse would use. Also I black undercoated the chassis and driver too. Painting this body is essential as it was an awful metallic bronze colour that no self-respecting post-apocalypse racing bad-arse would use. Also I black undercoated the chassis and driver too. Painting this body is essential as it was an awful metallic bronze colour that no self-respecting post-apocalypse racing bad-arse would use. Also I black undercoated the chassis and driver too. Painting this body is essential as it was an awful metallic bronze colour that no self-respecting post-apocalypse racing bad-arse would use. Also I black undercoated the chassis and driver too. I gave the shell an all over coat of Army Painter Ultramarine Blue. The colour was inspired by the car on the front to the rule book; I should have done a white stripe up the body too! I gave the shell an all over coat of Army Painter Ultramarine Blue. The colour was inspired by the car on the front to the rule book; I should have done a white stripe up the body too! Then I highlighted the body by adding white to the Ultramarine Blue, just highlighting the edges and then again with more white mixed in the blue mix. Then I highlighted the body by adding white to the Ultramarine Blue, just highlighting the edges and then again with more white mixed in the blue mix. I all painted black areas with black mixed with Army Painter Skeleton Bone, then highlighted them with a layer with more Skeleton Bone in the black.  I painted the visor with Wolf Grey, which I highlighted up quite a few times by adding white to the Wolf Grey.  I painted the visor with Wolf Grey, which I highlighted up quite a few times by adding white to the Wolf Grey. All the implements were given a coat of Gun Metal, apart from the missile. All the implements were given a coat of Gun Metal, apart from the missile. I painted the wheels black and then highlighted the black exactly as I did with the chassis. No self respecting post-apocalypse racing bad-arse could race in a pristine car, so I painted on some damage in Gun Metal, and the same on the dozer blade. I tried not to do too much, but it’s hard to stop yourself! No self respecting post-apocalypse racing bad-arse could race in a pristine car, so I painted on some damage in Gun Metal, and the same on the dozer blade. I tried not to do too much, but it’s hard to stop yourself! No self respecting post-apocalypse racing bad-arse could race in a pristine car, so I painted on some damage in Gun Metal, and the same on the dozer blade. I tried not to do too much, but it’s hard to stop yourself! No self respecting post-apocalypse racing bad-arse could race in a pristine car, so I painted on some damage in Gun Metal, and the same on the dozer blade. I tried not to do too much, but it’s hard to stop yourself!
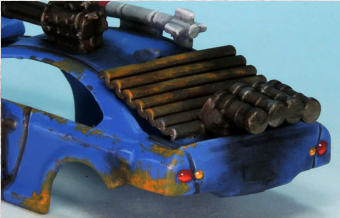
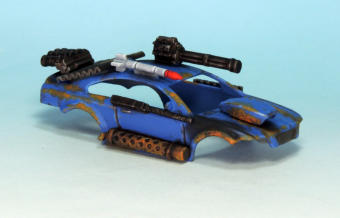
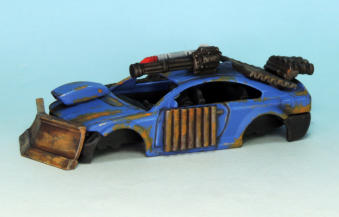
DIRT I then gave the Dozer an overall coat or two of Mid Brown Quickshade wash, and then the same to the body. RUST The rust was a mix of a first coat of Wet Mud Effects, then a mix of Mythical Orange and Fire Lizard. This went over a lot of the damage Gun Metal, trying to keep it random looking, but with the exhaust getting special attention. I then used the Dark Tone Quickshade wash around the doors and exhaust to delineate the details.
I then gave the Dozer an overall coat or two of Mid Brown Quickshade wash, and then the same to the body. The rust was a mix of a first coat of Wet Mud Effects, then a mix of Mythical Orange and Fire Lizard. This went over a lot of the damage Gun Metal, trying to keep it random looking, but with the exhaust getting special attention. The rust was a mix of a first coat of Wet Mud Effects, then a mix of Mythical Orange and Fire Lizard. This went over a lot of the damage Gun Metal, trying to keep it random looking, but with the exhaust getting special attention.
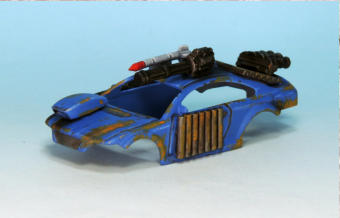
MISSILE The missile is painted in Ash Grey, highlighted up with Ash Grey mixed with white, and that Ash Grey white mix, mixed with more white. The red tip is Dragon Red, then Pure Red, and then Pure Red mixed with Lava Orange.
The missile is painted in Ash Grey, highlighted up with Ash Grey mixed with white, and that Ash Grey white mix, mixed with more white. The red tip is Dragon Red, then Pure Red, and then Pure Red mixed with Lava Orange. I couldn’t resist painting the rear lights, the stoplights are Dragon Red, then Pure Red, and then Pure Red with Lava Orange and the indicators are Lava Orange, then Mythical Orange, and then Fire Lizard. Then both had a final highlight dot of white. The missile is painted in Ash Grey, highlighted up with Ash Grey mixed with white, and that Ash Grey white mix, mixed with more white. The red tip is Dragon Red, then Pure Red, and then Pure Red mixed with Lava Orange. The missile is painted in Ash Grey, highlighted up with Ash Grey mixed with white, and that Ash Grey white mix, mixed with more white. The red tip is Dragon Red, then Pure Red, and then Pure Red mixed with Lava Orange.
STOP LIGHTS AND WINKERS I couldn’t resist painting the rear lights, the stoplights are Dragon Red, then Pure Red, and then Pure Red with Lava Orange and the indicators are Lava Orange, then Mythical Orange, and then Fire Lizard. Then both had a final highlight dot of white.
For the dirt from the guns smoke is black weathering chalks.
SMOKING GUNS For the dirt from the guns smoke is black weathering chalks. TRY IT TOGETHER I put the halves together to see how it looked. WHEELS I then tried out the wheels, and gave them a coat of Mid Brown Quickshade wash.
I put the halves together to see how it looked. I put the halves together to see how it looked. I then tried out the wheels, and gave them a coat of Mid Brown Quickshade wash. I then tried out the wheels, and gave them a coat of Mid Brown Quickshade wash.
TRY IT MORE TOGETHER This is all the bits together.
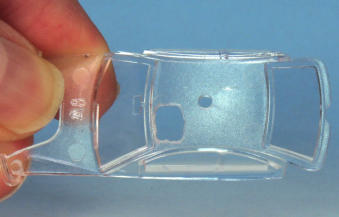
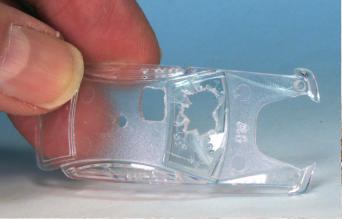
WINDSCREEN The windscreen needed a bit of adjustment to give room for the drivers head, so I drilled and cut out a slot for him. I decided to have the front screen smashed, so I drilled it through it and cut out a zigzag broken glass shape with the scalpel. Also I used the drill to make “bullet holes” in the screen.
This is all the bits together. This is all the bits together. This is all the bits together. This is all the bits together. The windscreen needed a bit of adjustment to give room for the drivers head, so I drilled and cut out a slot for him. I decided to have the front screen smashed, so I drilled it through it and cut out a zigzag broken glass shape with the scalpel. Also I used the drill to make “bullet holes” in the screen. Finally the whole thing together. Finally the whole thing together. Finally the whole thing together. Finally the whole thing together.
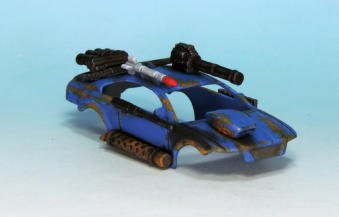
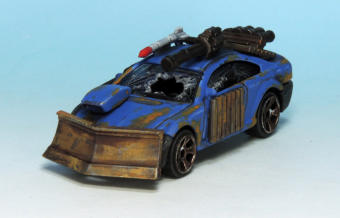
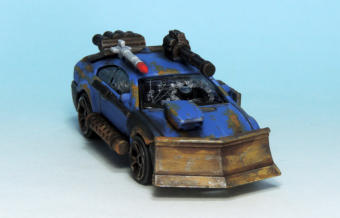
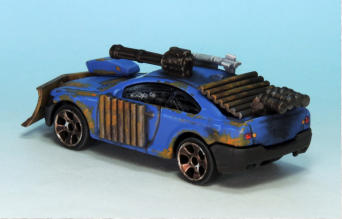
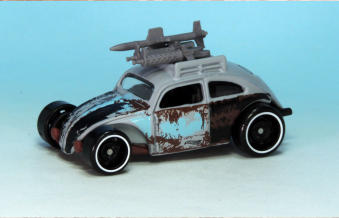
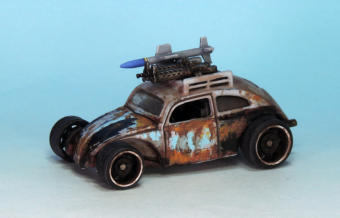
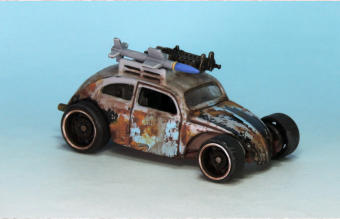
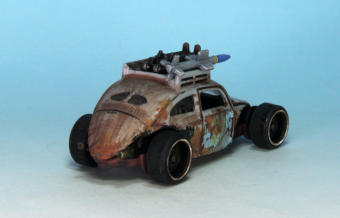
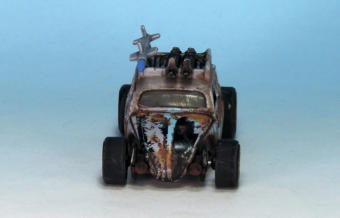
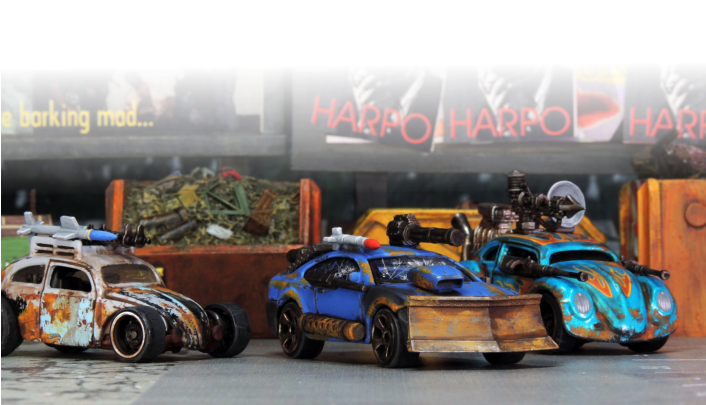
OTHER CARS These are a couple of Hot Wheels I converted using the same techniques and Implements of Carnage.
What's from the frame? Machine guns, harpoon gun and satellite disc. What's from the frame? Twin machine guns and missile.
What's from the frame? Twin machine guns and missile.
What's from the frame? Machine guns, harpoon gun and satellite disc. What's from the frame? Machine guns, harpoon gun and satellite disc. What's from the frame? Machine guns, harpoon gun and satellite disc. What's from the frame? Machine guns, harpoon gun and satellite disc. What's from the frame? Twin machine guns and missile. What's from the frame? Twin machine guns and missile. What's from the frame? Twin machine guns and missile. What's from the frame? Twin machine guns and missile. Friends of Gaslands Implements Of Carnage Pre order