

What do you do when you urgently need reinforcements? You can’t use unpainted models and when you are
 gaming a more unusual period you can’t just borrow some
 as they don’t exist in other peoples collections. You could
 use proxies but you can’t find them either. So there is
 nothing left but to paint them and paint them fast!
  Now I have a somewhat of a reputation for not being able
 to paint things quickly, it is true and some of my friends
 believe I couldn’t even if I have to. However anyone who
 has read my first painting book will know I have a streak
 of fast painting in me, in fact I dedicated several sections
 in that book to just that, using techniques both fast and
 hopefully satisfactory to produce good basic wargames
 figures for the gaming table and possibly to be a
 springboard to more and more complex techniques to
 come later. These involved using neat single colour
 painting with no shading or just two colour shading, but
 keeping things simple as possible covering many different
 periods from Romans to Darkest Africa, this isn’t quite the
 same as that, but along the similar lines. Also not every
 model you paint has to be a masterpiece (and I apologise
 if that is the impression I have perpetrated over the
 years), allow yourself to have a go at something just to
 see how it turns out.
There are some problems with this sort of speed
 technique (and all speedy techniques truth be told), some
 parts of the process takes just as long whatever level of
 paintwork you are hoping to achieve. For example it is
 hard to speed up the cleaning up process, and fatal to
 skimp on time for the final basing, as just like a well
 painted shield a well finished base disguises a multitude
 of short cuts elsewhere.
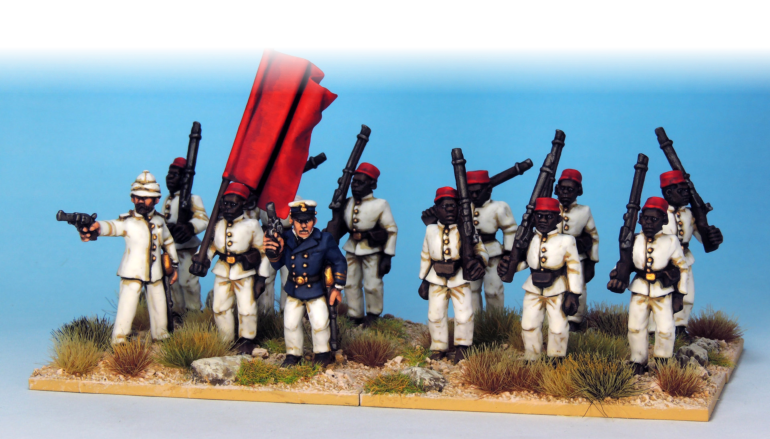
As the title implies the figures that I had decided to paint
 up quick were late 19th Century Zanzibar regular soldiers
 as reinforcements for my Royal Naval Landing Party that I
 use when gaming with the Death in the Dark Continent
 rules for wargaming in 19th Century Africa [as it happens
 the Navy were painted in a fast style using three colour
 shading method I designed many years ago]. The choice
 of the Zanzibaris was not only dictated by the army list in
 the rules but also the availability of appropriate lovely
 models from Copplestone Castings.
 Before you even get the
figures
For this technique to work satisfactorily it is better to
 follow a couple of points.
 You can’t use unpainted models and when you are
 gaming a more unusual period you can’t just borrow some
 as they don’t exist in other peoples collections. You could
 use proxies but you can’t find them either. So there is
 nothing left but to paint them and paint them fast!
  Now I have a somewhat of a reputation for not being able
 to paint things quickly, it is true and some of my friends
 believe I couldn’t even if I have to. However anyone who
 has read my first painting book will know I have a streak
 of fast painting in me, in fact I dedicated several sections
 in that book to just that, using techniques both fast and
 hopefully satisfactory to produce good basic wargames
 figures for the gaming table and possibly to be a
 springboard to more and more complex techniques to
 come later. These involved using neat single colour
 painting with no shading or just two colour shading, but
 keeping things simple as possible covering many different
 periods from Romans to Darkest Africa, this isn’t quite the
 same as that, but along the similar lines. Also not every
 model you paint has to be a masterpiece (and I apologise
 if that is the impression I have perpetrated over the
 years), allow yourself to have a go at something just to
 see how it turns out.
There are some problems with this sort of speed
 technique (and all speedy techniques truth be told), some
 parts of the process takes just as long whatever level of
 paintwork you are hoping to achieve. For example it is
 hard to speed up the cleaning up process, and fatal to
 skimp on time for the final basing, as just like a well
 painted shield a well finished base disguises a multitude
 of short cuts elsewhere.
As the title implies the figures that I had decided to paint
 up quick were late 19th Century Zanzibar regular soldiers
 as reinforcements for my Royal Naval Landing Party that I
 use when gaming with the Death in the Dark Continent
 rules for wargaming in 19th Century Africa [as it happens
 the Navy were painted in a fast style using three colour
 shading method I designed many years ago]. The choice
 of the Zanzibaris was not only dictated by the army list in
 the rules but also the availability of appropriate lovely
 models from Copplestone Castings.
 Before you even get the
figures
For this technique to work satisfactorily it is better to
 follow a couple of points.
THE ZANZIBAR EXPRESS
Late 19th Century Zanzibar regular soldiers.
1. Choose well sculpted and well made models, this will give you the best chance of producing a good job and
 saves time (your painting will get much of the credit for the
 good model). In this case I chose models by master
 sculptor Mark Copplestone produced by North Star. So I
 got both of those achieved.
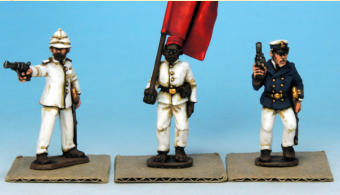
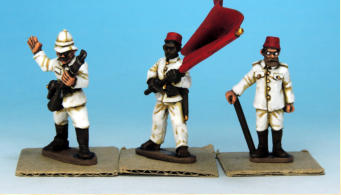
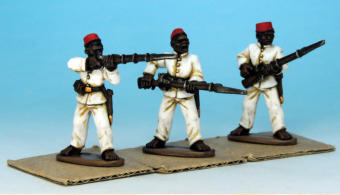
  2. Choose a uniform that is relatively simple, not tartan or
 one involving lots of piping and multiple colours. Well they
 don’t come much more straightforward than these
 Zanzbari regulars, all in white with a red fez, and the
 same for officers apart from the one blue jacket, and that
 jacket was the wrong pattern to be white, so had to be
 navy, damn!
  (At this time the Zanzibar army was commanded by
 British or European, mostly naval officers, a practice that
 seems odd to our eyes modern but was very common in
 colonial Africa.)
3. Make sure you plan your painting for maximum speed
 and efficiency, think about the order of doing things so you
 can get as much done as fast as possible, I made some
 errors on this front that I will tell you about as I go. Also try
 to use colours straight from the bottle not mixing up any
 special colours as this will save much pondering and
 mixing.
ONCE YOU GET THE FIGURES
The Cleaning up (120 minutes)
This is the tedious or therapeutic (depending on your point
 of view) process of removing unwanted metal from the
 model, be it moulding lines or vents or sprues, which I
 have written about Ad nauseam. You could speed this up,
 by leaving the moulding lines, but unless you are going for
 the authentic toy soldier look I would scrape off and file off
 those pesky lines. But if your model arrives in a very poor
 state, requiring major surgery, don’t accept it; ask the
 manufacturer for a better replacement casting. (All
 reputable manufacturers would rather know if a mould is
 failing.)
  As well as cleaning the lads up I made some flags for
 them from aluminium foil wrapped around a steel wire. I
 had to remove the rifles from the chosen standard bearer
 models but this was very simple cut and fill job. Some
 might say “a painted flag are you mad? Surely a printed
 paper one would be quicker or none at all!” Not in this
 case as the period Zanzibar flag was plain bright red and I
 have a mountain of discarded aluminium foil tubes to use
 up (doesn’t everybody?)
 give you the best chance of producing a good job and
 saves time (your painting will get much of the credit for the
 good model). In this case I chose models by master
 sculptor Mark Copplestone produced by North Star. So I
 got both of those achieved.
  2. Choose a uniform that is relatively simple, not tartan or
 one involving lots of piping and multiple colours. Well they
 don’t come much more straightforward than these
 Zanzbari regulars, all in white with a red fez, and the
 same for officers apart from the one blue jacket, and that
 jacket was the wrong pattern to be white, so had to be
 navy, damn!
  (At this time the Zanzibar army was commanded by
 British or European, mostly naval officers, a practice that
 seems odd to our eyes modern but was very common in
 colonial Africa.)
3. Make sure you plan your painting for maximum speed
 and efficiency, think about the order of doing things so you
 can get as much done as fast as possible, I made some
 errors on this front that I will tell you about as I go. Also try
 to use colours straight from the bottle not mixing up any
 special colours as this will save much pondering and
 mixing.
ONCE YOU GET THE FIGURES
The Cleaning up (120 minutes)
This is the tedious or therapeutic (depending on your point
 of view) process of removing unwanted metal from the
 model, be it moulding lines or vents or sprues, which I
 have written about Ad nauseam. You could speed this up,
 by leaving the moulding lines, but unless you are going for
 the authentic toy soldier look I would scrape off and file off
 those pesky lines. But if your model arrives in a very poor
 state, requiring major surgery, don’t accept it; ask the
 manufacturer for a better replacement casting. (All
 reputable manufacturers would rather know if a mould is
 failing.)
  As well as cleaning the lads up I made some flags for
 them from aluminium foil wrapped around a steel wire. I
 had to remove the rifles from the chosen standard bearer
 models but this was very simple cut and fill job. Some
 might say “a painted flag are you mad? Surely a printed
 paper one would be quicker or none at all!” Not in this
 case as the period Zanzibar flag was plain bright red and I
 have a mountain of discarded aluminium foil tubes to use
 up (doesn’t everybody?)

Painting Reinforcements Faster for
Death in the Dark Continent
Kev Dallimore
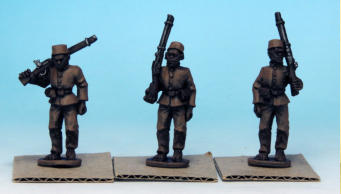
At this point I realised I had made a mistake, as the metal gun barrels and pistols also needed a wash of the Strong
 Tone. So I painted in all the gunmetal bits in Army Painter
Gun Metal and then gave them a Strong Tone wash. (10
 minutes)
I also washed around the buttons and buckles with Strong
 Tone. If they had had brown uniforms they would have
 been almost finished!
 gun barrels and pistols also needed a wash of the Strong
 Tone. So I painted in all the gunmetal bits in Army Painter
Gun Metal and then gave them a Strong Tone wash. (10
 minutes)
I also washed around the buttons and buckles with Strong
 Tone. If they had had brown uniforms they would have
 been almost finished!
The White Uniforms (240
minutes)
Again three layers dark to light done quickly but neatly, and more loosely than my normal, I generally achieve this
 by using one of my more worn out brushes.
 Layer 1. Army Painter Desert Yellow, it doesn’t matter if
 it doesn’t cover well at this stage as most of it will covered
 up and where it covers best, in the depressions, that is
 precisely the bits you will leave showing when you do the
 next coat.
Layer 2. Army Painter Skeleton Bone, leaving a little of
 the first layer showing in the creases.
 and more loosely than my normal, I generally achieve this
 by using one of my more worn out brushes.
 Layer 1. Army Painter Desert Yellow, it doesn’t matter if
 it doesn’t cover well at this stage as most of it will covered
 up and where it covers best, in the depressions, that is
 precisely the bits you will leave showing when you do the
 next coat.
Layer 2. Army Painter Skeleton Bone, leaving a little of
 the first layer showing in the creases.
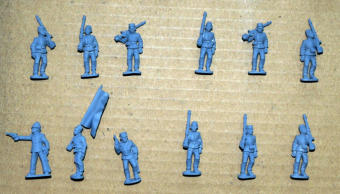
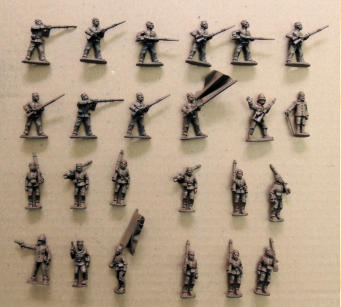
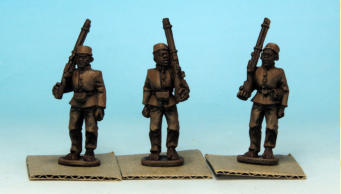
The first thing I did was to spray them in grey car primer
(any good quality acrylic car primer will do), just a light
coating to smooth out the surfaces a bit, and give a good
surface for the next coats.
THE PAINTING
Priming (10 minutes)
The first thing I did was to spray them in grey car primer (any good quality acrylic car primer will do), just a light
 coating to smooth out the surfaces a bit, and give a good
 surface for the next coats. The models are laid flat and
 coated one side and left to dry the turn over and sprayed
 again.
  Undercoat (5 minutes)
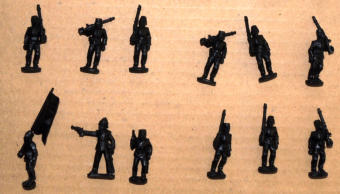
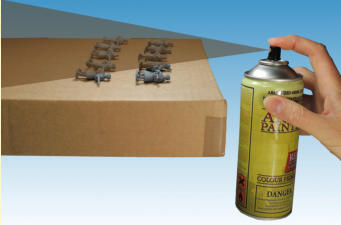
The next coat was Army Painter Matt Black Undercoat
 spray. The Army Painter sprays are very pigment heavy,
 much more so than the car primer, and give good
 coverage, but the force of the spray isn’t as powerful and
 the car primer so be careful of windy gusts if you are
 doing it outside (which I recommended for ventilation).
 The models are still laid flat for spraying here, to avoid
 them sticking when you do the back of them I lay them on
 a sheet of baking parchment stolen from the kitchen.
 Colour coat (5 minutes)
The next coat was Army Painter Leather Brown spray.
 Army painter says, “This spray is ideal for wood
 (warmachines and Chariots), leather and brown skin and
 fur. Also use for great effect on horses, wolves, Beastmen
 and Minontaurs for instance”. So I took them at there word
 and used it as it would be the colour of the chaps skin and
 woodwork and also the leather straps and pouches.
  However I didn’t spray it on like an undercoat in a random
 straight on, all over kind of way. With the models still laid
 flat, this coat was sprayed from just one angle and this
 was from the top spraying towards the feet of the models
 while holding the spray can in the same plain as the
 models, not spraying directly at them like you would
 normally when undercoating. Also be very light in the
 spraying as these cans put out a lot of paint!
This mono directional technique is to try and create a
 shadow effect on the undercoated models. But it only
 works if you spray it from that one top down direction. I
 have since found out it is called Zenithal highlights with
 spray paints and I didn’t invent it!
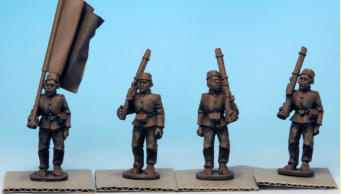
 I then stuck the models to some card remnants for the
 rest of their paintwork.
 (any good quality acrylic car primer will do), just a light
 coating to smooth out the surfaces a bit, and give a good
 surface for the next coats. The models are laid flat and
 coated one side and left to dry the turn over and sprayed
 again.
  Undercoat (5 minutes)
The next coat was Army Painter Matt Black Undercoat
 spray. The Army Painter sprays are very pigment heavy,
 much more so than the car primer, and give good
 coverage, but the force of the spray isn’t as powerful and
 the car primer so be careful of windy gusts if you are
 doing it outside (which I recommended for ventilation).
 The models are still laid flat for spraying here, to avoid
 them sticking when you do the back of them I lay them on
 a sheet of baking parchment stolen from the kitchen.
 Colour coat (5 minutes)
The next coat was Army Painter Leather Brown spray.
 Army painter says, “This spray is ideal for wood
 (warmachines and Chariots), leather and brown skin and
 fur. Also use for great effect on horses, wolves, Beastmen
 and Minontaurs for instance”. So I took them at there word
 and used it as it would be the colour of the chaps skin and
 woodwork and also the leather straps and pouches.
  However I didn’t spray it on like an undercoat in a random
 straight on, all over kind of way. With the models still laid
 flat, this coat was sprayed from just one angle and this
 was from the top spraying towards the feet of the models
 while holding the spray can in the same plain as the
 models, not spraying directly at them like you would
 normally when undercoating. Also be very light in the
 spraying as these cans put out a lot of paint!
This mono directional technique is to try and create a
 shadow effect on the undercoated models. But it only
 works if you spray it from that one top down direction. I
 have since found out it is called Zenithal highlights with
 spray paints and I didn’t invent it!
 I then stuck the models to some card remnants for the
 rest of their paintwork.
The Rest of the Painting
Well it follows my normal method of three colour painting from dark to light, but done in a quicker more informal way
 and adding the use of washes to help things along, and
 most importantly sticking to only three colours or shades.
The Officers Flesh (20 minutes)
The first thing I did was to paint the European officers
 flesh as I happened to have some flesh colours on the go
 for another job. Three layers dark to light done quickly but
 neatly.
Layer 1. Army Painter Fur Brown.
  Layer 2. Army Painter Tanned Flesh.
Layer 3. Army Painter Barbarian Flesh.
 The Soldier’s Flesh,
Leatherwork and Woodwork
(20 minutes)
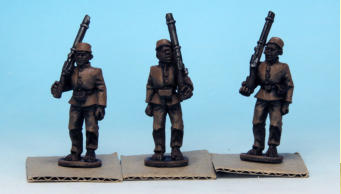
I gave the soldier’s flesh a wash of Army Painter
 Quickshade Wash Strong Tone, really laying it on and
 going back over any bits still looking too light, you can
 even slosh a bit more on when it has dried.
 from dark to light, but done in a quicker more informal way
 and adding the use of washes to help things along, and
 most importantly sticking to only three colours or shades.
The Officers Flesh (20 minutes)
The first thing I did was to paint the European officers
 flesh as I happened to have some flesh colours on the go
 for another job. Three layers dark to light done quickly but
 neatly.
Layer 1. Army Painter Fur Brown.
  Layer 2. Army Painter Tanned Flesh.
Layer 3. Army Painter Barbarian Flesh.
 The Soldier’s Flesh,
Leatherwork and Woodwork
(20 minutes)
I gave the soldier’s flesh a wash of Army Painter
 Quickshade Wash Strong Tone, really laying it on and
 going back over any bits still looking too light, you can
 even slosh a bit more on when it has dried.
I didn’t spray the Army Painter Leather Brown on like an
undercoat in a random straight on. With the models still
laid flat, I sprayed from just one angle and this was from
the top spraying towards the feet of the models while
holding the spray can in the same plain as the models.
The next coat was Army Painter Leather Brown spray.
This mono directional technique is to try and create a
shadow effect on the undercoated models.
Layer 3. Army Painter Matt White, again leaving some of the under layers showing, but not much!
  Notice how that the white top coat really does cover most
 of the layers below. You will also notice I painted eyes in
 on some of the models, while I had the white paint out,
 just to see if I could do it quickly and neatly, and it worked
 ok, but if you are in any doubt don’t bother with them, I left
 them off one unit altogether.
 You could try to use just Army Painter Matt White for the
 uniforms; it does cover surprisingly well and forget any
 shading for a super quick finish.
 of the under layers showing, but not much!
  Notice how that the white top coat really does cover most
 of the layers below. You will also notice I painted eyes in
 on some of the models, while I had the white paint out,
 just to see if I could do it quickly and neatly, and it worked
 ok, but if you are in any doubt don’t bother with them, I left
 them off one unit altogether.
 You could try to use just Army Painter Matt White for the
 uniforms; it does cover surprisingly well and forget any
 shading for a super quick finish.
The Rest of the Uniform, Hats
and Flags (120 minutes)
Layer 1. Army Painter Chaotic Red. Layer 2. Army Painter Dragon Red.
 Layer 3. Army Painter Pure Red.
Half of them I did just the first two colours on to save time.
 Buttons and Buckles (90
minutes)
Layer 1. Army Painter Weapon Bronze.
Layer 2. Army Painter Greedy Gold.
 Layer 3. Foundry Burning Gold.
 Layer 2. Army Painter Dragon Red.
 Layer 3. Army Painter Pure Red.
Half of them I did just the first two colours on to save time.
 Buttons and Buckles (90
minutes)
Layer 1. Army Painter Weapon Bronze.
Layer 2. Army Painter Greedy Gold.
 Layer 3. Foundry Burning Gold.
The next coat was Army Painter Matt Black Undercoat
spray. The Army Painter sprays are very pigment heavy,
much more so than the car primer, and give good
coverage.
I then stuck the models to some card remnants for the rest
of their paintwork.
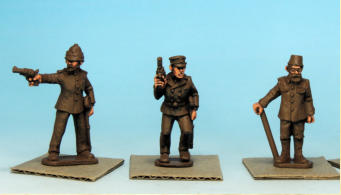
European officers flesh three layers dark to light done
quickly but neatly.
I gave the soldier’s flesh a wash of Army Painter
Quickshade Wash Strong Tone.
The metal gun barrels and pistols also needed a wash of the Strong Tone.
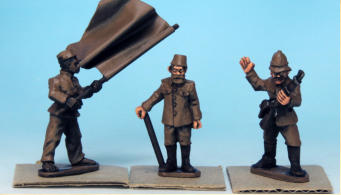
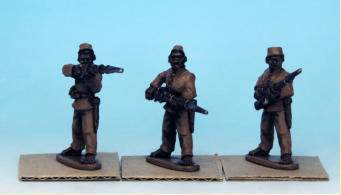
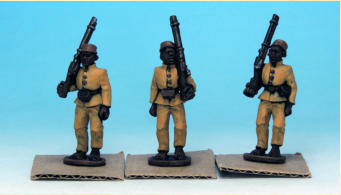
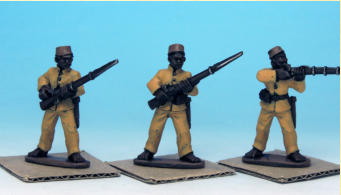
The White Uniforms, Layer 1. Army Painter Desert Yellow, it doesn’t matter if it doesn’t cover well at this stage.
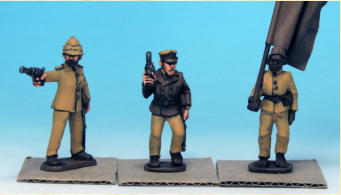
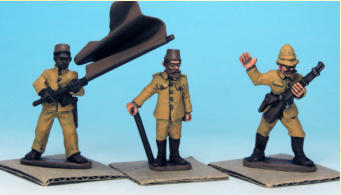
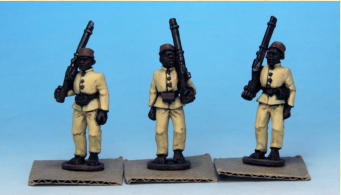
The White Uniforms, Layer 2. Army Painter Skeleton Bone, leaving a little of the first layer showing in the creases.
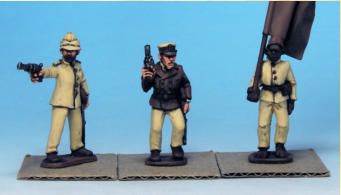
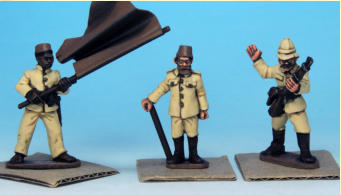
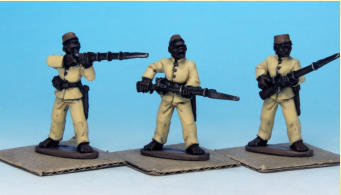
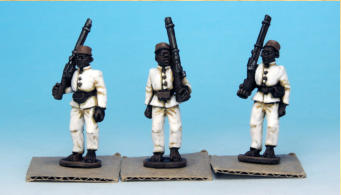
The White Uniforms, Layer 3. Army Painter Matt White, again leaving some of the under layers showing, but not much!
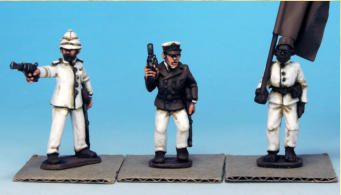
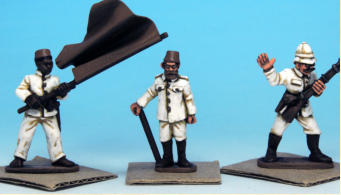
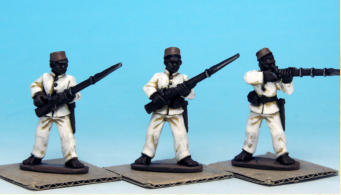
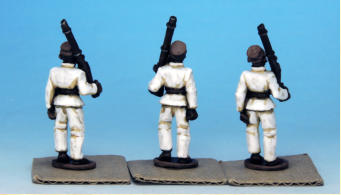
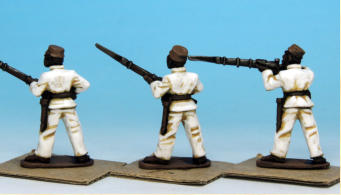
The Navy Jacket that just
couldn’t be white… (15
minutes)
Layer 1. Army Painter Deep Blue mixed with Army Painter Matt Black.
Layer 2. The above with a bit of Army Painter Matt
 White.
Layer 3. and then a bit more white.
Then a quick spray varnish and a nice base and they are
 done and ready for action!
  That’s 11 hours or so, not including the basing, about half
 an hour per model, for acceptable models that don’t
 disgrace the figure itself or the gaming table, let’s hope
 they can fight as well! (Which they have done, though I
 can’t say if that was because of the painting, but it was…).
 Painter Matt Black.
Layer 2. The above with a bit of Army Painter Matt
 White.
Layer 3. and then a bit more white.
Then a quick spray varnish and a nice base and they are
 done and ready for action!
  That’s 11 hours or so, not including the basing, about half
 an hour per model, for acceptable models that don’t
 disgrace the figure itself or the gaming table, let’s hope
 they can fight as well! (Which they have done, though I
 can’t say if that was because of the painting, but it was…).
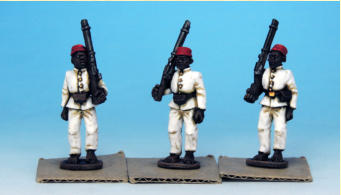
The Rest of the Uniform, Hats and Flags.
The Navy Jacket that just couldn’t be white…
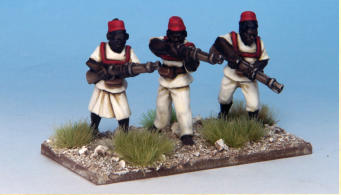
The Finished Units
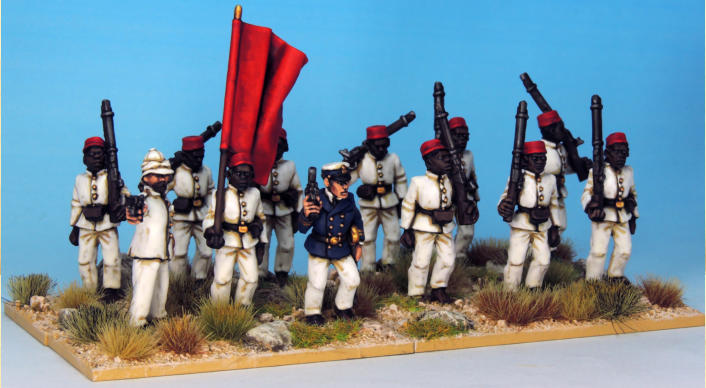
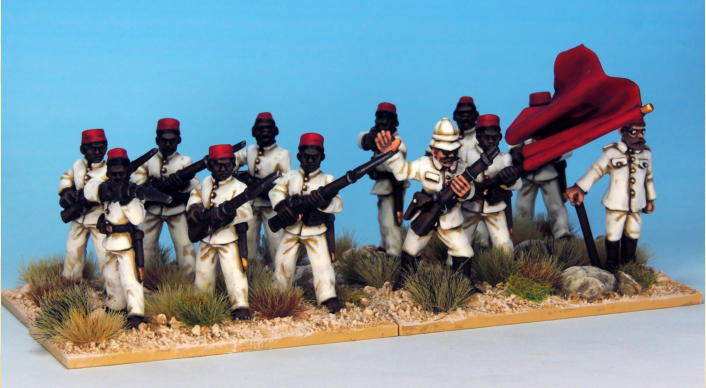
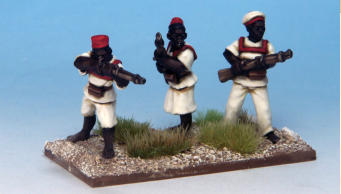
German East Africa Co. Askaris painted in the same way for Death in the Dark Continent.
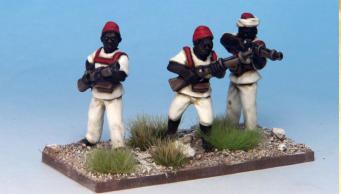
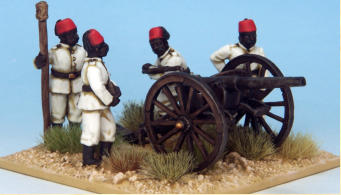
Perry Miniatures Egyptian Artillery painted the same.
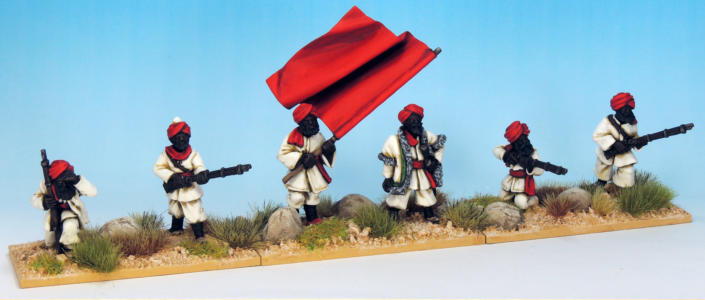
Zanzibari Skirmishers painted in the same way for Death in the Dark Continent, Artizan Designs, 2nd Afghan War -
Afghans and March or Die - Tuaregs sculpted by Mike Owen.


