CLEAN UP
Cut off more parts than you think you will need, so you can try different options out. I cut the parts off the sprue with
 side-cutters, the sprue is quite chunky so be careful and don’t
try chopping at it with your knife. When I had figured out
 what parts I needed for a properly gruesome Orc, I set about
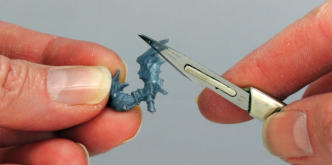
 cleaning them up before assembly. I cleaned the parts up with
 a very sharp scalpel, there was very little to do in fact, just
 scraping along the mould lines to remove these and removing
 any sprue marks.
ASSEMBLY
For strength I used superglue and an accelerator for the initial
 sticking, and then flooded the joints with liquid solvent
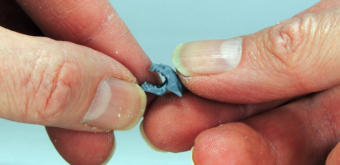
 cement. The only slightly fiddlely bit is the jaw, which is a
 separate piece to allow a really massive gape! Fit the jaw
 before you attach the head to the body. Fortunately the jaw
 has a slight bit of spring to it and locates and stays in place
 ready for gluing, so you can do the wide open look or, well,
 they don’t close like our teeth do, but the look good closed up
too.
 try different options out. I cut the parts off the sprue with
 side-cutters, the sprue is quite chunky so be careful and don’t
try chopping at it with your knife. When I had figured out
 what parts I needed for a properly gruesome Orc, I set about
 cleaning them up before assembly. I cleaned the parts up with
 a very sharp scalpel, there was very little to do in fact, just
 scraping along the mould lines to remove these and removing
 any sprue marks.
ASSEMBLY
For strength I used superglue and an accelerator for the initial
 sticking, and then flooded the joints with liquid solvent
 cement. The only slightly fiddlely bit is the jaw, which is a
 separate piece to allow a really massive gape! Fit the jaw
 before you attach the head to the body. Fortunately the jaw
 has a slight bit of spring to it and locates and stays in place
 ready for gluing, so you can do the wide open look or, well,
 they don’t close like our teeth do, but the look good closed up
too.
Then fix the head to the body, again you will have plenty of options to move the heads about before final gluing. And then
 attach arms and weapons. It is essential to choose the most
 suitable arms for the body you have selected, if you want the
 Orc anatomy to look good on the finished model. Try different
 arms, temporarily fixing them in place with blue tack.
 THE LAST THING BEFORE PAINTING
The last thing I did was to glue the Orc to a bit of plasticard that
fitted perfectly the recess in the bases supplied with the set.
 This was so I could just pop him in the base when he was done
 and then do the base texturing. I could have drilled and stuck a
 pin in his leg ready to attach him to anyone of the many
 aftermarket resin textured bases; maybe I will do that for the
 next ones!
UNDERCOATING
Undercoating is essential as it provides a consistent surface on
 which to apply the next coats of paint, and it shows up the
 detail on a model much more clearly than shiny grey plastic.
 options to move the heads about before final gluing. And then
 attach arms and weapons. It is essential to choose the most
 suitable arms for the body you have selected, if you want the
 Orc anatomy to look good on the finished model. Try different
 arms, temporarily fixing them in place with blue tack.
 THE LAST THING BEFORE PAINTING
The last thing I did was to glue the Orc to a bit of plasticard that
fitted perfectly the recess in the bases supplied with the set.
 This was so I could just pop him in the base when he was done
 and then do the base texturing. I could have drilled and stuck a
 pin in his leg ready to attach him to anyone of the many
 aftermarket resin textured bases; maybe I will do that for the
 next ones!
UNDERCOATING
Undercoating is essential as it provides a consistent surface on
 which to apply the next coats of paint, and it shows up the
 detail on a model much more clearly than shiny grey plastic.
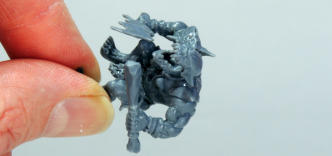
Above left. I cleaned the parts up with a very sharp scalpel, there was very little to do in fact, just scraping along the mould lines to remove these and removing any sprue marks. Above right. Fit the jaw before you attach the head to the body.
 to remove these and removing any sprue marks. Above right. Fit the jaw before you attach the head to the body.
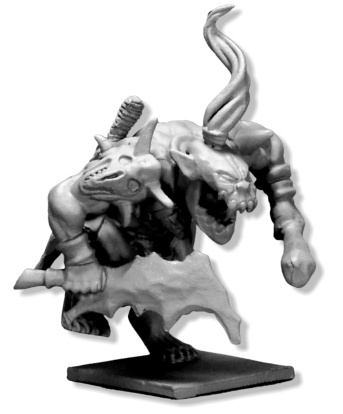
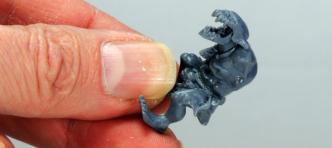
Below. Fix the head to the body, you will have plenty of options to move the heads about before final gluing. then the
 arms and weapons.
 options to move the heads about before final gluing. then the
 arms and weapons.
Below. The fully assembled Orc primed first with aerosol grey car
 primer, spray on lightly so as not
 the clag the detail.
 primed first with aerosol grey car
 primer, spray on lightly so as not
 the clag the detail.


