




Assembling the Oathmark Elves
In this short article I will go through the approach I have to
putting together plastic kit soldiers, specifically the Oathmark
Elves but the techniques would apply to any of the numbers
plastics now available.
Elf Assembly
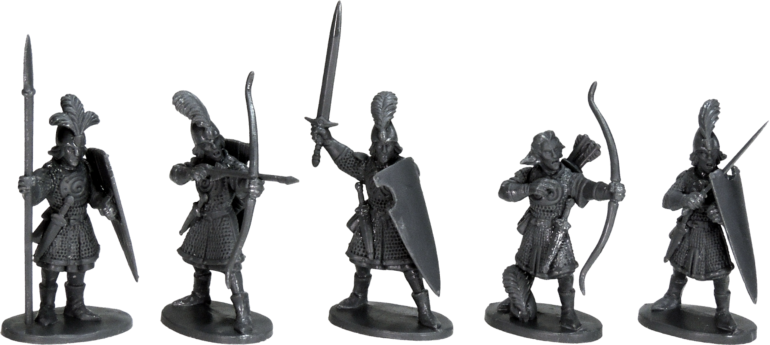


Above. The assembled Elves.
Forged in the Fireforge
I was converted to these multipart plastic soldiers by
Frostgrave, not the Frostgrave plastic figures themselves,
magnificent though they are, they were not yet made. But it
was the Fireforge medieval plastics I built, converted and
painted as surrogates for the Frostgrave soldiers, to use in
my photography for the Frostgrave book itself. These little
chaps opened my eyes to the potentials and pitfalls of multi-
part plastic soldiers.
Pretend Sculptor
The main benefit for me is I can pretend to be a sculptor by
trying out different arm and head positions and seeing what
looks good, but with the skill level dramatically reduced. I
should point out I have no sculpting chops whatever, so they
allow me to get a bit of a thrill from “creating” a unique model.
I think this significantly adds to the creative experience of our
hobby, even if it costs you a bit of extra time. (Only slightly
spoiled when you see a real sculptor, like Mark Copplestone,
put one of these kits together and start to add things…).
Dubious Pleasure
So now I have built and painted many multipart plastic
soldiers most in 28mm, but I have also had the dubious
pleasure of building and painting some of the “3up”
prototypes that are the fathers of the smaller final production
models. (When being made for production these models are
made three times the final size by the sculptor, resin casts are
sometime taken at this stage, then they are reduced in scale
size during the final production mould making).
Things You Will Need
As follows: A very sharp knife or scalpel; liquid polystyrene
cement; small modelling side-cutters (which always seem to
have yellow handles); preferably a cutting matt or gash card
to work on; old stiff paintbrush; sticking plasters.
Having a Look
When I am going to put together some of these multi-part
model plastic figures the first thing is to have a proper look at
the sprue and see what you have got. I usually start with a
body and then try various parts out to see what I like, or copy
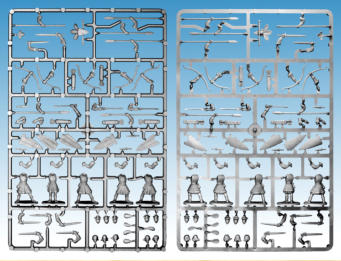
Below. The Elf frames front and back. The box set
contains six of the frames, enough to build 30 Elves.
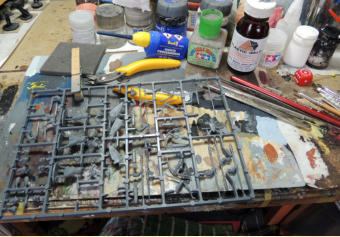
Above. The work surface and tools.
an assembly someone else has done that looks good. (Some
people will wash the sprue before attempting assemble, but I
have never done this).
Do Not Try to Snap Parts
I carefully snip the parts off the sprue with small modelling
side-cutters (the ones with the yellow handles), the sprue is
fairly chunky so be careful, but the plastic itself isn’t brittle.
Best not to try chopping at it with a knife however, as is may
snap in the wrong place, and you may damage other
important parts on the sprue or even yourself! Once you have
chopped all around the part it should fall out, without needing
to be snapped off. I cut off just the bits I think I will for a whole
model, body, arms, head and shield. Definitely do not try to
snap parts off with your bare hands.
Removing Lines
Some of the parts will need the fine mould lines removing
before assembly. I cleaned them up with a very very sharp (or
brand new) scalpel, scraping along the mould lines to remove
these and removing any marks left where I chopped them off
the sprue. I have a scalpel blade that I keep just to use for
this purpose, I did try having a whetstone handy to keep the
blade sharp, but you can’t beat a blade that has only lightly
touched plastic. BE VERY CAREFUL OF THE SHARP
SCALPEL, I wasn’t and have two cuts in my left thumb from it
and a chunk removed by my clippers. Once you have
successfully removed any mould lines, the fine plastic detritus
left should be carefully brushed into your bin with a stiff old
paintbrush, otherwise this stuff gets everywhere because of
the static charge in it.
Dry Runs
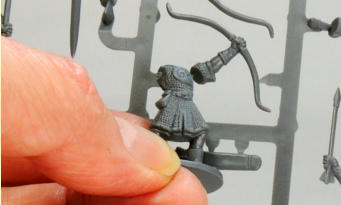
If you aren’t sure about how to assemble the parts, you can
hold the bodies up to the arms while still on the sprue and see
if those will do, or have a dry run with some Blu-Tack and see
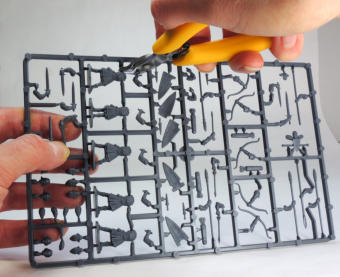
Below. Carefully snipping the parts off the sprue.
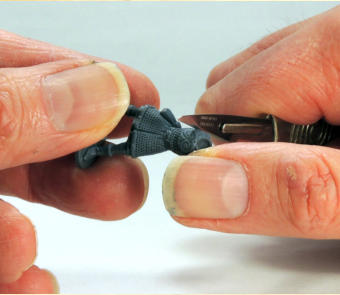
Above. Scraping along the mould lines to remove
them.
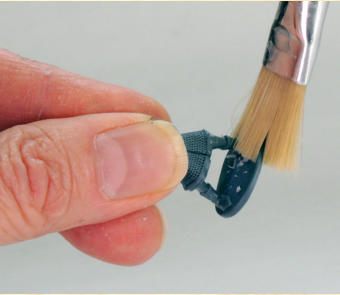
Above. Plastic shavings carefully brushed into your
bin.
what works to your satisfaction. If you are inexperienced with
these kits, always try out an arrangement somehow before
you commit it to gluing. You can kind of tell what’s going to be
successful once you have done several hundred, but
seriously, do study what good sculptors like Mark
Copplestone do with their models and you will soon get the
hang of it. After a while you will be shelling them out like
peas.
Assembling Elves
I usually glue the arms on first, and then I can see
approximately which way the figure needs to be looking and
then glue the head on accordingly. Apply a tiny amount of
cement to the arm the press it to the body and hold for a short
while to sort of tack it in place, you will still have a while to
reposition it if you are not happy. Once you are happy with the
position you can apply more liquid cement to fix it in place.
Then carry on attaching the other bits to complete your figure.
This is Not ABS
You can use any sort of good polystyrene cement; I use thick
and thin types as the need arises. The thicker ones can often
be useful for tack things into place, they take slightly longer to
cure so can be useful if you do a lot of repositioning, then do
the final gluing with the thin liquid cement. This is not ABS
however; you won’t need anything terribly aggressive. Some
people swear by superglue but that has its own issues. Any of
these cements are quite serious stuff, so make sure you
follow the manufacturers instructions at all times. (ABS
[Acrylonitrile Butadiene Styrene] is a tough thermoplastic
resin, harder and stronger than polystyrene).
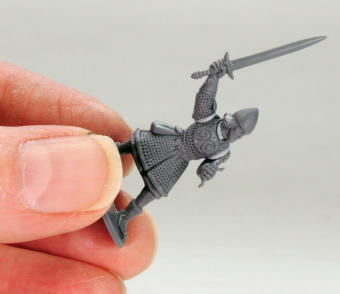
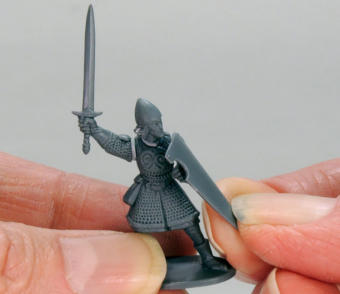
Above Right. Holding the body up to the arms while still on the sprue and see if those will make a good pose.
Below. Dry runs with some Blu-Tack to see what works to your satisfaction, the shield is just held in place.
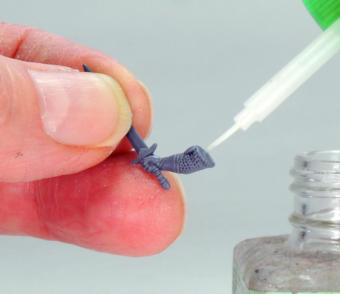
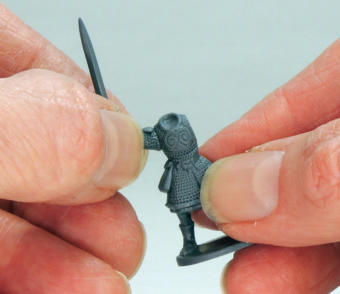
Above. A tiny amount of cement applied to the arm.
Above. Press it to the body and hold for a short
while.
A Change of Heart
When I had finished assembling two of the blighters I
suddenly decided I would give them feathered plumes, so I
went back to the sprue. The plumes are quite small and have
a high risk of being eaten by the carpet monster if dropped, so
I gave these a quick clean up while they were still attached to
the sprue, then snipped them off and finally trimmed up the
point where they will be attaching to the helmet.
Smoothing Out
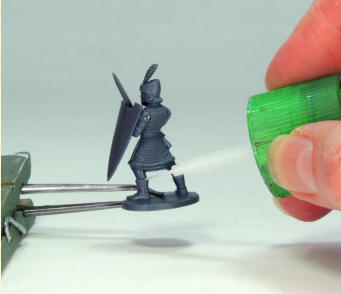
To smooth out the places where I have cleaned off any mould
lines I go round with the liquid cement carefully “painting” over
these marks just enough to soften them a bit. Do this process
very gingerly as you can easily swamp the figure in glue if you
are not very careful. This painting also melts any fine dust that
may have been left by the cleaning up process. The shininess
of some parts of the figures in the photos is an unfortunate
side effect of this glue painting. If you have any small gaps or
discrepancies in the fit of any parts, try filling the gap with a
tiny off cut of sprue, then “painting” over it with your cement
till it softens and melts into place. You can then trim this with
your sharp knife to make a clean job of it.
Some More Elves
It is difficult to stop at assembling just one or two of these
figures, it is so additive once you get the hang of it, and so I
finished off the sprue and put all five together. Also it’s hard
not to start to mess about with them, I couldn’t do too much
here, but I couldn’t resist giving the bareheaded elf a
discarded helmet on the floor beside him. This is from one of
the five spare heads I have left on the sprue, trimmed down to
just the helmet and cemented in place with a matching plume.
Leave them to harden at least overnight, the plastic takes
time to regain strength after having been melted by the
cements.
The Next Instalment.
Painting Elves.
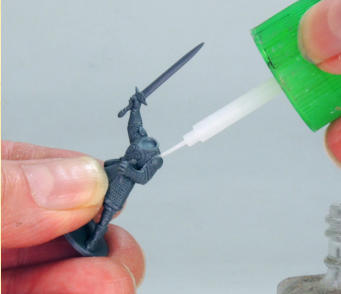
Below. Once you are happy with the position you
can apply more liquid cement to fix it in place.
Below. Liquid cement carefully “painted” over
clean up marks just enough to soften them a bit.
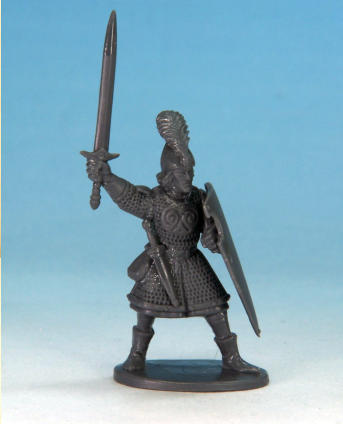
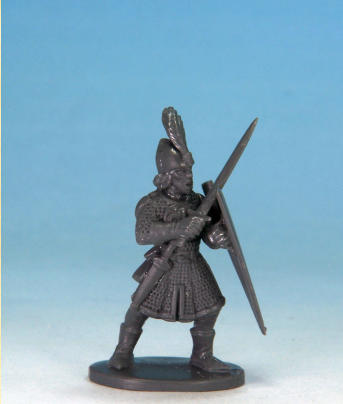
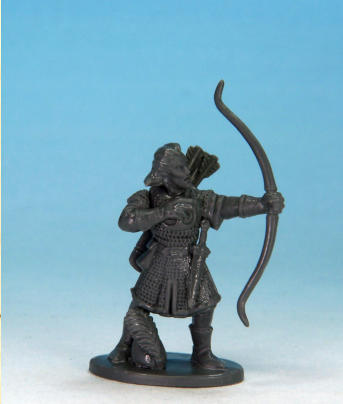
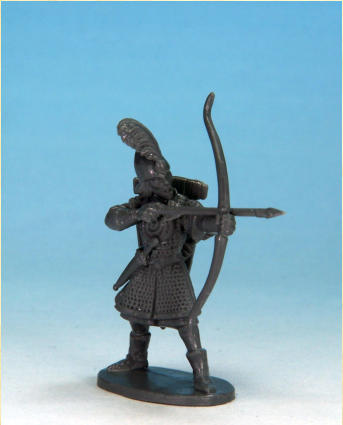
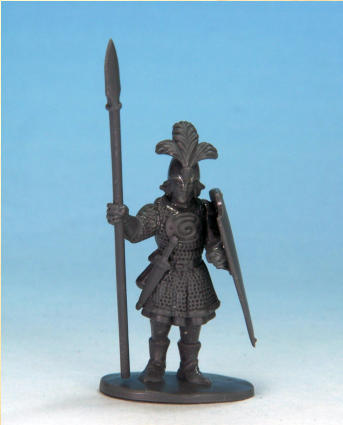
Right and below. The fully assembled Elves, now
just waiting for a paint job.


