












FELT-TIP
As a long-time fan of Speedpaints, I was curious to see how The Army Painter’s new Speedpaint
 Markers stacked up. At first glance, they look like felt-
tip pens and in essence, that’s exactly what they are,
 but instead of ink they deliver Speedpaint. I wasn’t
 sure what to expect, but I gave them a proper test
 across a number of miniatures, and they turned out to
 be surprisingly capable. This is my experience using
 the Starter Set, from first impressions to final touches,
 with a few detours into hybrid techniques and
 improvisation along the way.
IROQUOIS
I’d originally planned to paint some Iroquois, to go with the ones I’d already finished in Speedpaints, but
 the Starter Set didn’t include a suitable flesh tone. So
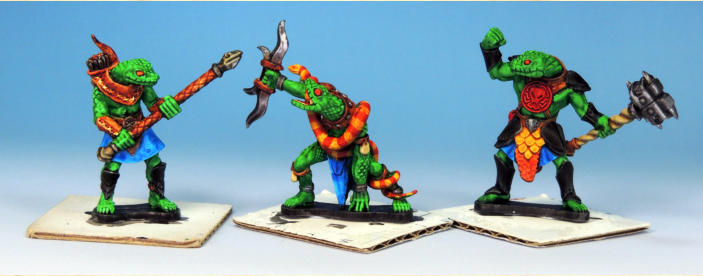
 I turned to Snake-men, as the set included Orc Skin
 which made a great green colour for their flesh. The
 Snake-men are from North Star’s Frostgrave:
 Ghost Archipelago.
PRIMED
I’d prepped the figures for standard Speedpaints using the excellent TT Combat aerosol sprays.
 Starting with an all-over coat of Black V2 Spray
 Primer, applied normally, followed by a zenithal coat
 of White V2 Spray Primer. For the zenithal
 undercoat, I sprayed white from directly above, at a
 90-degree angle to the top of the model’s head. If you
 search YouTube for “zenithal undercoat,” you’ll find
 plenty of examples. The goal isn’t to completely cover
 the darker primer, but to leave some of it visible
 underneath, creating natural shadows and built-in
 shading, so a light touch is essential. Don’t flood the
 paint. One of the great things about TT Combat
sprays is how controllable they are; if you go carefully,
you’ll get excellent results. Another bonus: they leave a consistently matt finish, which is the ideal surface
 for Speedpaints.
 colours first, but this time I ignored the official
 guidance, as I could see there were some awkward,
 hard-to-reach areas that needed the green flesh tones
early on. The marker nibs aren’t as fine as I’d have
 liked, though you can easily trim them down with a
 sharp blade to make a more precise tool. I decided to
 limit myself to just the colours in the Starter Set, at
 least to begin with. Once the flesh was done, I tried to
 follow the recommended light-to-dark approach. I was
 sceptical at first; I couldn’t imagine the markers
 delivering the kind of flow Speedpaints need, but they
 do. In fact, they provide a very consistent flow, which
 is great for covering larger areas. Just make sure to
 prime the markers properly (as the guidance
 suggests) at the start, and re-prime them periodically
 to keep the flow going.
 Snake-men, and they handled most surfaces
 surprisingly well, even larger areas like cloaks and
 kilts. They were most effective on textured flesh, much
 like conventional Speedpaints. The only real limitation
 is the nib size, but with ten replacement nibs included,
 don’t be afraid to trim them to suit your needs. Like
 actual Speedpaints, I applied them carefully to avoid
 overrunning areas not intended for a particular colour.
It’s a bit more time-consuming at the application
 stage, but it saves time later on.
 a consistently matt finish, which is the ideal surface
 for Speedpaints.
ADVICE
I usually follow the sound advice about painting lighter colours first, but this time I ignored the official
 guidance, as I could see there were some awkward,
 hard-to-reach areas that needed the green flesh tones
early on. The marker nibs aren’t as fine as I’d have
 liked, though you can easily trim them down with a
 sharp blade to make a more precise tool. I decided to
 limit myself to just the colours in the Starter Set, at
 least to begin with. Once the flesh was done, I tried to
 follow the recommended light-to-dark approach. I was
 sceptical at first; I couldn’t imagine the markers
 delivering the kind of flow Speedpaints need, but they
 do. In fact, they provide a very consistent flow, which
 is great for covering larger areas. Just make sure to
 prime the markers properly (as the guidance
 suggests) at the start, and re-prime them periodically
 to keep the flow going.
TEXTURES
I tested them on all sorts of textures across the Snake-men, and they handled most surfaces
 surprisingly well, even larger areas like cloaks and
 kilts. They were most effective on textured flesh, much
 like conventional Speedpaints. The only real limitation
 is the nib size, but with ten replacement nibs included,
 don’t be afraid to trim them to suit your needs. Like
 actual Speedpaints, I applied them carefully to avoid
 overrunning areas not intended for a particular colour.
It’s a bit more time-consuming at the application
 stage, but it saves time later on.
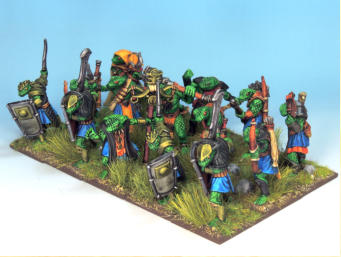
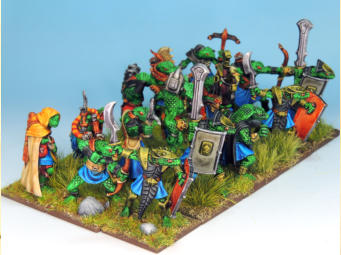
Above. The “Oathmark”Snake-man Infantry unit, ready for battle.
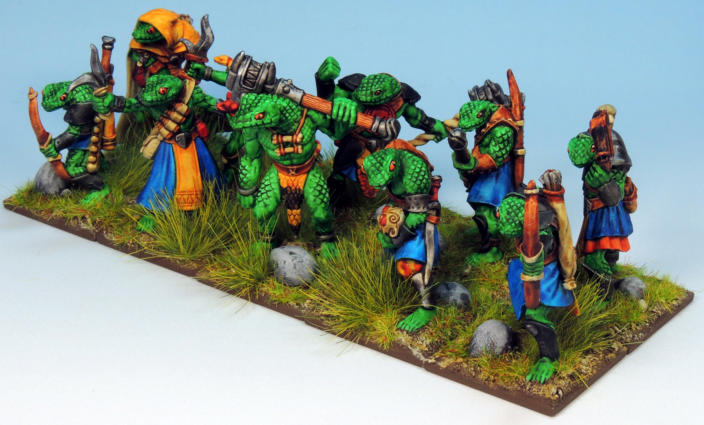
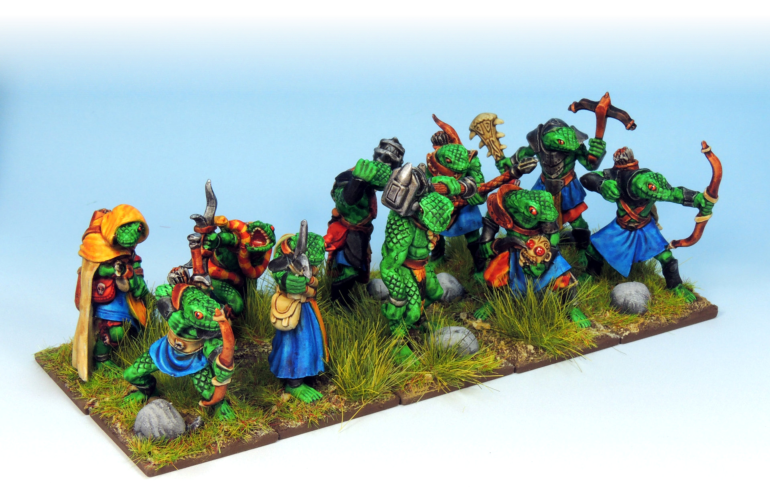
Above. Orc Skin. Snakeman flesh. Top row; Scout, Heritor I & Herbalist, bottom row; Guide, Warden II & Heritor II.
Orc Skin. Snakeman flesh.  Magic Blue. Snakeman kilts.
Zealot Yellow. Other clothing and details, hoods,
 snake etc.
Pallid Bone. Cloaks and bags, quivers, club, bones
 etc.
Fire Giant Orange. Sword hilts, quiver and other
 details like eyes.
Hardened Leather. Wood, some belts, bottles and
 armour.
Blood Red. Stripes on the snake, some bottles,
 chest roundel and so on.
 Magic Blue. Snakeman kilts.
Zealot Yellow. Other clothing and details, hoods,
 snake etc.
Pallid Bone. Cloaks and bags, quivers, club, bones
 etc.
Fire Giant Orange. Sword hilts, quiver and other
 details like eyes.
Hardened Leather. Wood, some belts, bottles and
 armour.
Blood Red. Stripes on the snake, some bottles,
 chest roundel and so on.


Grim Black. Some armour and other contrast details.  Polished Silver. Some more armour and the
 weapons blades and hilts.
Gravelord Grey Over the Polished Silver.
 Pallid Bone in particular could use a bit more oomph.
 Just make sure the first coat is fully dry before
 applying another, or the marker nib might lift the initial
 layer and spoil the finish. The nibs are obviously stiffer
than a paintbrush, so take care not to scrub too hard
 and risk damaging your undercoat.
 Polished Silver. Some more armour and the
 weapons blades and hilts.
Gravelord Grey Over the Polished Silver.
SECOND
Some colours needed a second coat to really pop — Pallid Bone in particular could use a bit more oomph.
 Just make sure the first coat is fully dry before
 applying another, or the marker nib might lift the initial
 layer and spoil the finish. The nibs are obviously stiffer
than a paintbrush, so take care not to scrub too hard
 and risk damaging your undercoat.
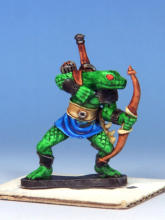
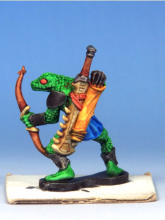
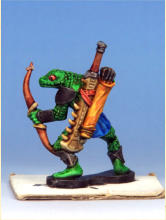
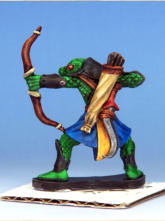
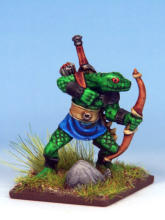
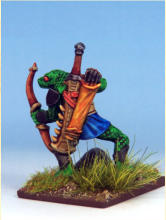
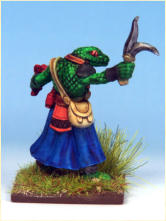
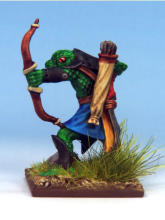
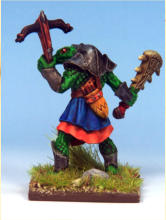
Hunter. The bow and sword hilt are in Hardened Leather, the quiver is Zealot Yellow, kilt is Magic
 Blue and the armour all Grim Black.
 Leather, the quiver is Zealot Yellow, kilt is Magic
 Blue and the armour all Grim Black.
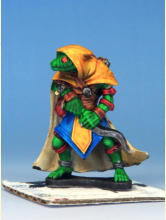
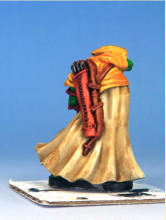
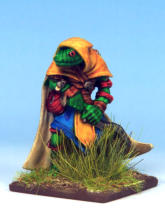
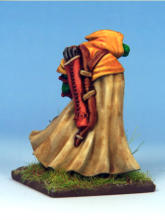
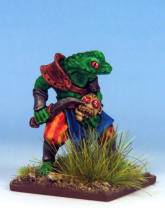
Heritor I. The hood is Zealot Yellow, the cloak Pallid Bone (two coats), quiver is Fire Giant
 Orange, fletchings in Gravelord Grey.
 Pallid Bone (two coats), quiver is Fire Giant
 Orange, fletchings in Gravelord Grey.
Hunter. I used Blue Tone wash to fix, where pooled. 


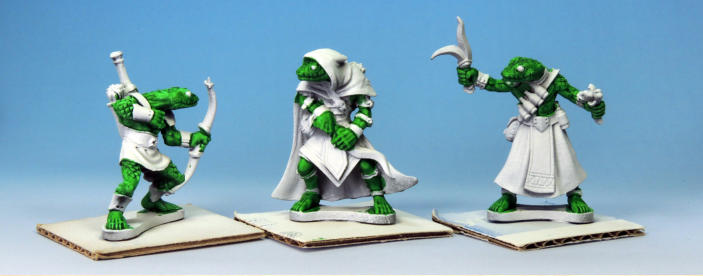
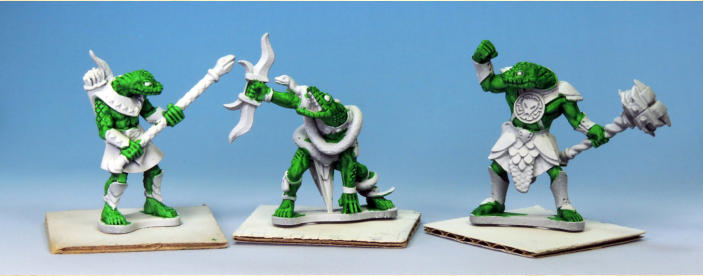
Above. Magic Blue. Snakeman kilts. Top row; Scout, Heritor I & Herbalist, bottom row; Guide, Warden II & Heritor II.
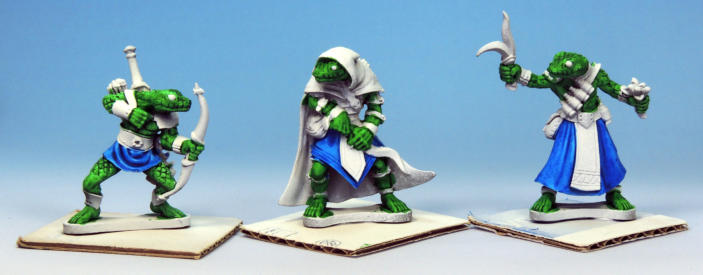
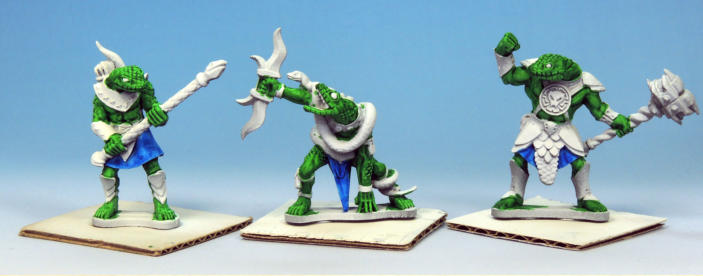
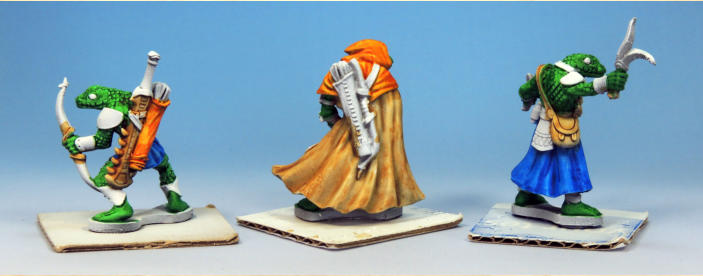
Above. Zealot Yellow. Other clothing and details, hoods, snake etc. Top row; Scout, Heritor I & Herbalist, bottom row;
Guide, Warden II & Heritor II.
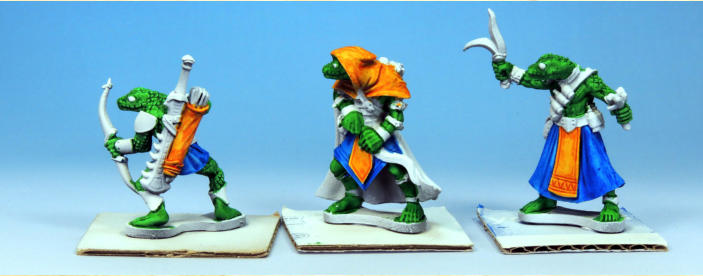
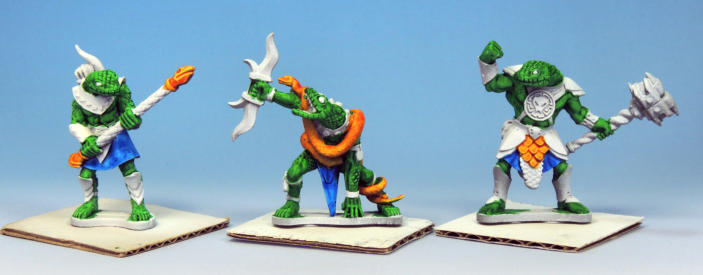
Above. Pallid Bone. Cloaks and bags, quivers, club, bones, etc. Top row; Scout, Heritor I & Herbalist, bottom row; Guide,
Warden II & Heritor II.
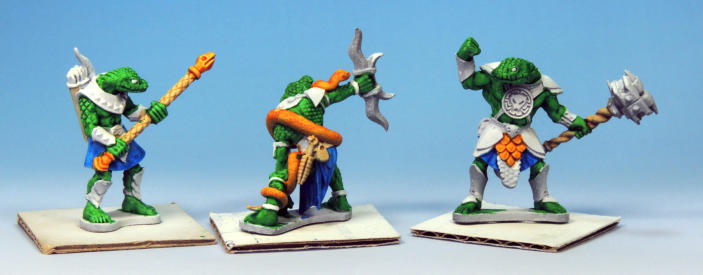
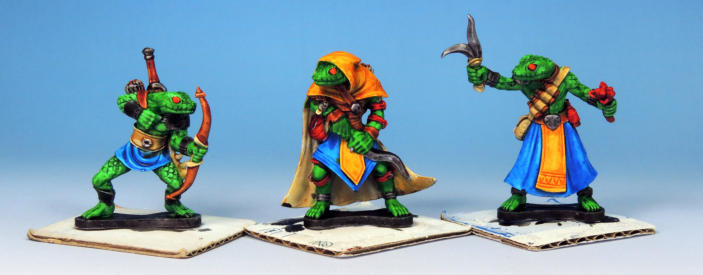
Above. The rest of the colours detailed below. Top row; Scout, Heritor I & Herbalist, bottom row; Guide, Warden II &
Heritor II.
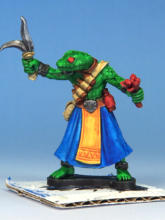
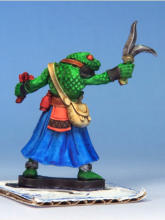
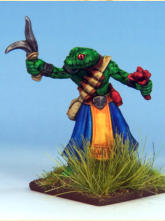
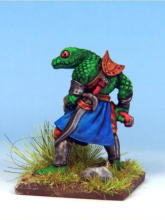
Herbalist. The panel on the front of the kilt is Zealot Yellow, on the back is Fire Giant Orange, the bag
 and bandoleer are Pallid Bone, the bunch of flowers
 and bottles in Blood Red.
 Yellow, on the back is Fire Giant Orange, the bag
 and bandoleer are Pallid Bone, the bunch of flowers
 and bottles in Blood Red.
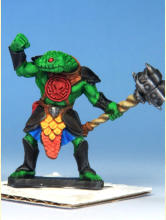
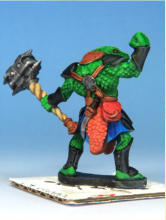
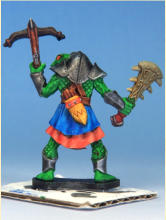
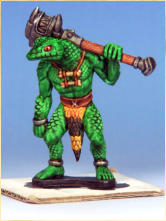
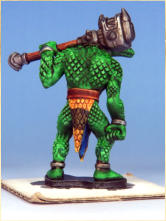
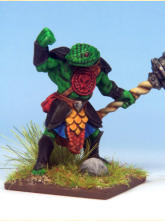
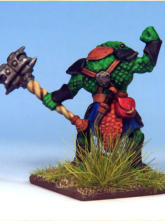
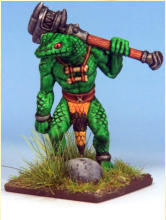
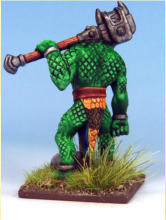
Heritor II. The chest roundel is in Blood Red, armour all Grim Black, mace haft Pallid Bone, mace
 head Polished Silver then Gravelord Grey, Zealot
 Yellow and Fire Giant Orange on the loincloth.
 armour all Grim Black, mace haft Pallid Bone, mace
 head Polished Silver then Gravelord Grey, Zealot
 Yellow and Fire Giant Orange on the loincloth.
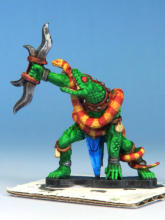
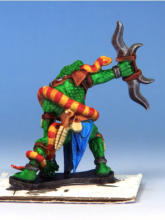
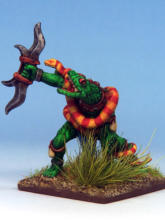
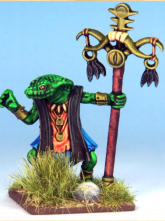
Warden II. The snake is Zealot Yellow overlaid with Blood Red stripes, Hardened Leather armour and
 details in Pallid Bone.
 Blood Red stripes, Hardened Leather armour and
 details in Pallid Bone.
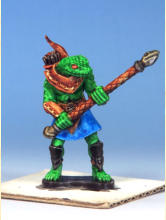
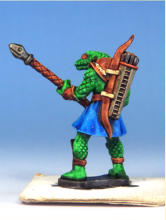
Guide. Spear shaft, bow and all the armour in Hardened Leather with details in Pallid Bone, kilt is
 Magic Blue, and the eyes are Fire Giant Orange.
 Hardened Leather with details in Pallid Bone, kilt is
 Magic Blue, and the eyes are Fire Giant Orange.
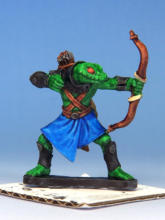
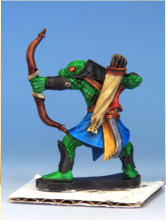
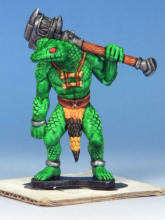
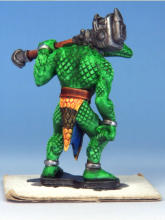
Scout. Grim Black armour, Hardened Leather belt, straps and bow, Pallid Bone quiver with Hardened
 Leather stripe, Zealot Yellow tunic detail at the
 back.
back.
 straps and bow, Pallid Bone quiver with Hardened
 Leather stripe, Zealot Yellow tunic detail at the
 back.
back.
Savage. Zealot Yellow snakeskin loincloth overlaid with Grim Black stripe, Pallid Bone bones,
 Hardened Leather mace haft, mace head Polished
 Silver then Gravelord Grey on top.
 with Grim Black stripe, Pallid Bone bones,
 Hardened Leather mace haft, mace head Polished
 Silver then Gravelord Grey on top.
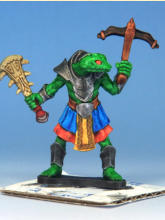
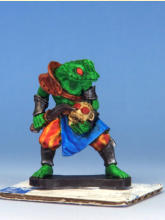
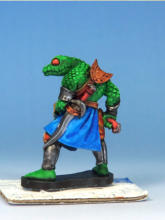
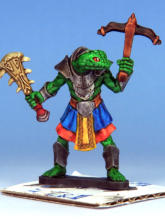
Crackshot. Club in Pallid Bone, armour Polished Silver then Gravelord Grey, kilt Magic Blue and
 Fire Giant Orange, with a Zealot Yellow panel
 down the front.
 Silver then Gravelord Grey, kilt Magic Blue and
 Fire Giant Orange, with a Zealot Yellow panel
 down the front.
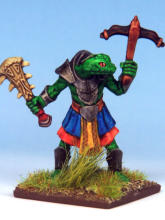
Tomb Robber. Hardened Leather belt, straps and shoulder armour, the rest of the armour Polished
 Silver and Gravelord Grey over it, Blood Red
 weapons hafts and stripes of his Yellow trousers.
 shoulder armour, the rest of the armour Polished
 Silver and Gravelord Grey over it, Blood Red
 weapons hafts and stripes of his Yellow trousers.
STANDOUT
The standout colour was Hardened Leather. It gives a reliable, versatile finish, perfect for leather
 (obviously), but also great for hair, teeth, and
 woodwork. The only oddball was Polished Silver: a
 lovely, bright metallic, but it doesn’t behave like a
 Speedpaint, it goes on as solid silver. That said,
 layering Gravelord Grey over it added the depth and
shading it needed.
DETAILING
Once I’d finished with the markers, I went back in with a brush for some detailing to match them with existing
models — but honestly, that was optional. The Speedpaint Markers produce a perfectly decent
 tabletop finish on their own.
I used Warpaints Washes: Green Tone to
 accentuate the scale details on the snake-men, and
 Warpaints Fanatic Wash: Blue Tone to correct
 some of the shading on the blue kilts where I wasn’t
 happy with the finish. The key detail was painting a
 black stripe in the eye, followed by a dot of white for
 reflection to really make them stand out.
I like this hybrid approach to painting, getting the bulk
 done with a fast system, and then finishing off with
 some careful detail that really sells them.
 Speedpaint Markers produce a perfectly decent
 tabletop finish on their own.
I used Warpaints Washes: Green Tone to
 accentuate the scale details on the snake-men, and
 Warpaints Fanatic Wash: Blue Tone to correct
 some of the shading on the blue kilts where I wasn’t
 happy with the finish. The key detail was painting a
 black stripe in the eye, followed by a dot of white for
 reflection to really make them stand out.
I like this hybrid approach to painting, getting the bulk
 done with a fast system, and then finishing off with
 some careful detail that really sells them.
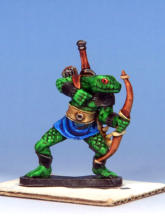
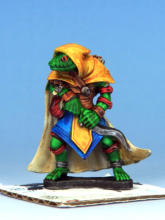
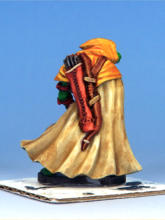
Heritor I. I added a bit more detail to the bow.
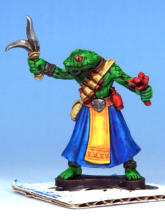
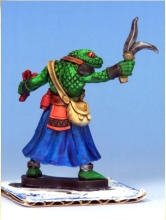
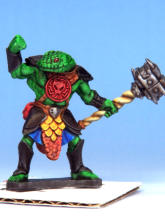
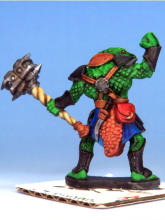
Herbalist. The handle of his knife Pallid Bone.
Heritor II. I used Red Tone wash on the roundle.
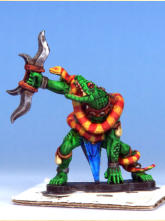
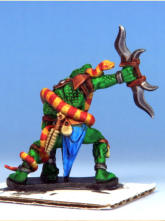
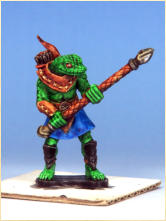
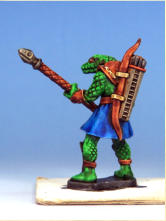
Warden II. His teeth are Pallid Bone. 

Guide. The quiver Pallid Bone & Gravelord Grey.
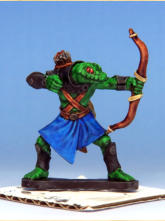
Scout. You can see difference the eye details make.
Savage. I wiped off some of Gravelord Grey.
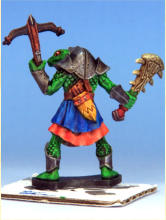
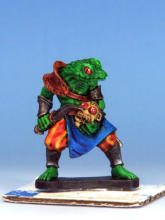
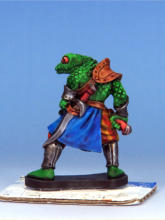
Crackshot. Gravelord Grey added to the loincloth.
Tomb Robber. Multiple reflections on the skull eyes.
VARNISHED
Then I varnished them with Army Painter spray can mat varnish, glossed the eyes, and based them up to in a similar vein to my other Oathmark models.
OATHMARK
Then I painted a few more to finish off the unit. Now hold on a minute, you’re saying, aren’t the Snake-men
for Frostgrave: Ghost Archipelago? Well yes, but I
 wanted them to be able to fight in Oathmark too.
 Hence the 25mm square bases and the need for
 more troops!
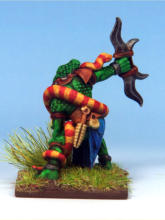
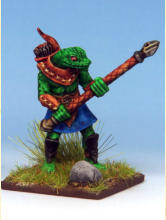
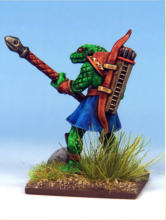
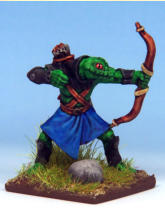
Hunter.
Heritor I.
Herbalist.
Heritor II.
Warden II.
Guide.
Scout. 

Savage.
Crackshot. 

Tomb Robber.
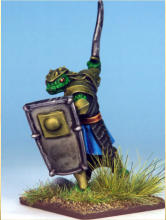
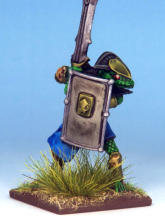
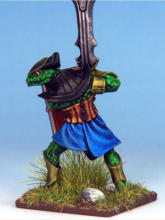
The rest of the unit is made up of Freebooters and Mercenaries, forming an armoured front rank
 alongside the other Warden. I added plastic shields
 to some of the Mercenaries and used Speedpaint:
 Aztec Gold from the Speedpaint Complete Set, for
 the armour on both types, as well as the metalwork on
 the Warden.
 Mercenaries, forming an armoured front rank
 alongside the other Warden. I added plastic shields
 to some of the Mercenaries and used Speedpaint:
 Aztec Gold from the Speedpaint Complete Set, for
 the armour on both types, as well as the metalwork on
 the Warden.
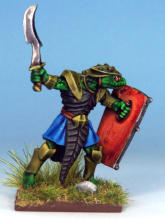
Freebooter.
Mercenary.
HANDY
All in all, Speedpaint Markers turned out to be a surprisingly handy addition to my painting toolkit.
 They’re not a replacement for brushes, but they offer
 a fast, clean way to get colour on miniatures —
 especially useful for batch painting. I’ll be
 experimenting further, and I suspect they’ll find their
 way into more of my projects before long. I reckon
 they’d work well on horses, those broad areas of flesh
 would benefit from the consistent flow. That’s next on
 the list, and I’ll report back.
IMPRESSIONS
To be fair, I’m probably not their target audience, even as a Speedpaint fan, but I can see them being a great
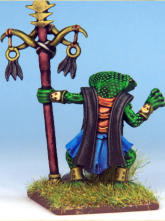
Warden.
introduction to Speedpaints, or even to painting in general. They’re clean, fuss-free, and travel-friendly. No brush cleaning, no mess — ideal for painting on holiday, or even en plein air, like the true impressionist I’d like
 to be.
 brush cleaning, no mess — ideal for painting on holiday, or even en plein air, like the true impressionist I’d like
 to be.
